
Why EP Henry Pavers Are the Perfect Choice for Your Fishers Home
EP Henry paver installation transforms ordinary outdoor spaces into stunning, durable surfaces that last for decades. Here’s the complete process:
Essential Installation Steps:
- Planning – Design layout, calculate materials, check permits
- Excavation – Dig 6-8 inches deep with proper drainage slope
- Base Preparation – Install geotextile fabric and compacted stone base
- Sand Bedding – Level 1-inch layer of coarse concrete sand
- Paver Installation – Lay pavers in chosen pattern from corner
- Finishing – Install edge restraints, compact, and apply polymeric sand
EP Henry pavers stand out as North America’s leading hardscape brand for good reason. Their interlocking concrete pavers offer a minimum compressive strength of 8,000 PSI – about three times stronger than regular poured concrete. Unlike stamped concrete that cracks in freeze-thaw cycles, EP Henry pavers move with the ground while maintaining their integrity.
The installation process might seem complex, but with proper planning and the right techniques, it’s absolutely achievable for motivated homeowners. The key is understanding that the base preparation accounts for over half your success – get that right, and your beautiful paver surface will last 50-100 years.
As Kyle Nix, owner of Nix Landscaping in Fishers, I’ve completed hundreds of EP Henry paver installation projects and helped countless homeowners achieve their dream outdoor spaces. Whether you’re tackling this as a DIY project or considering professional installation, understanding the process ensures you make informed decisions for your investment.
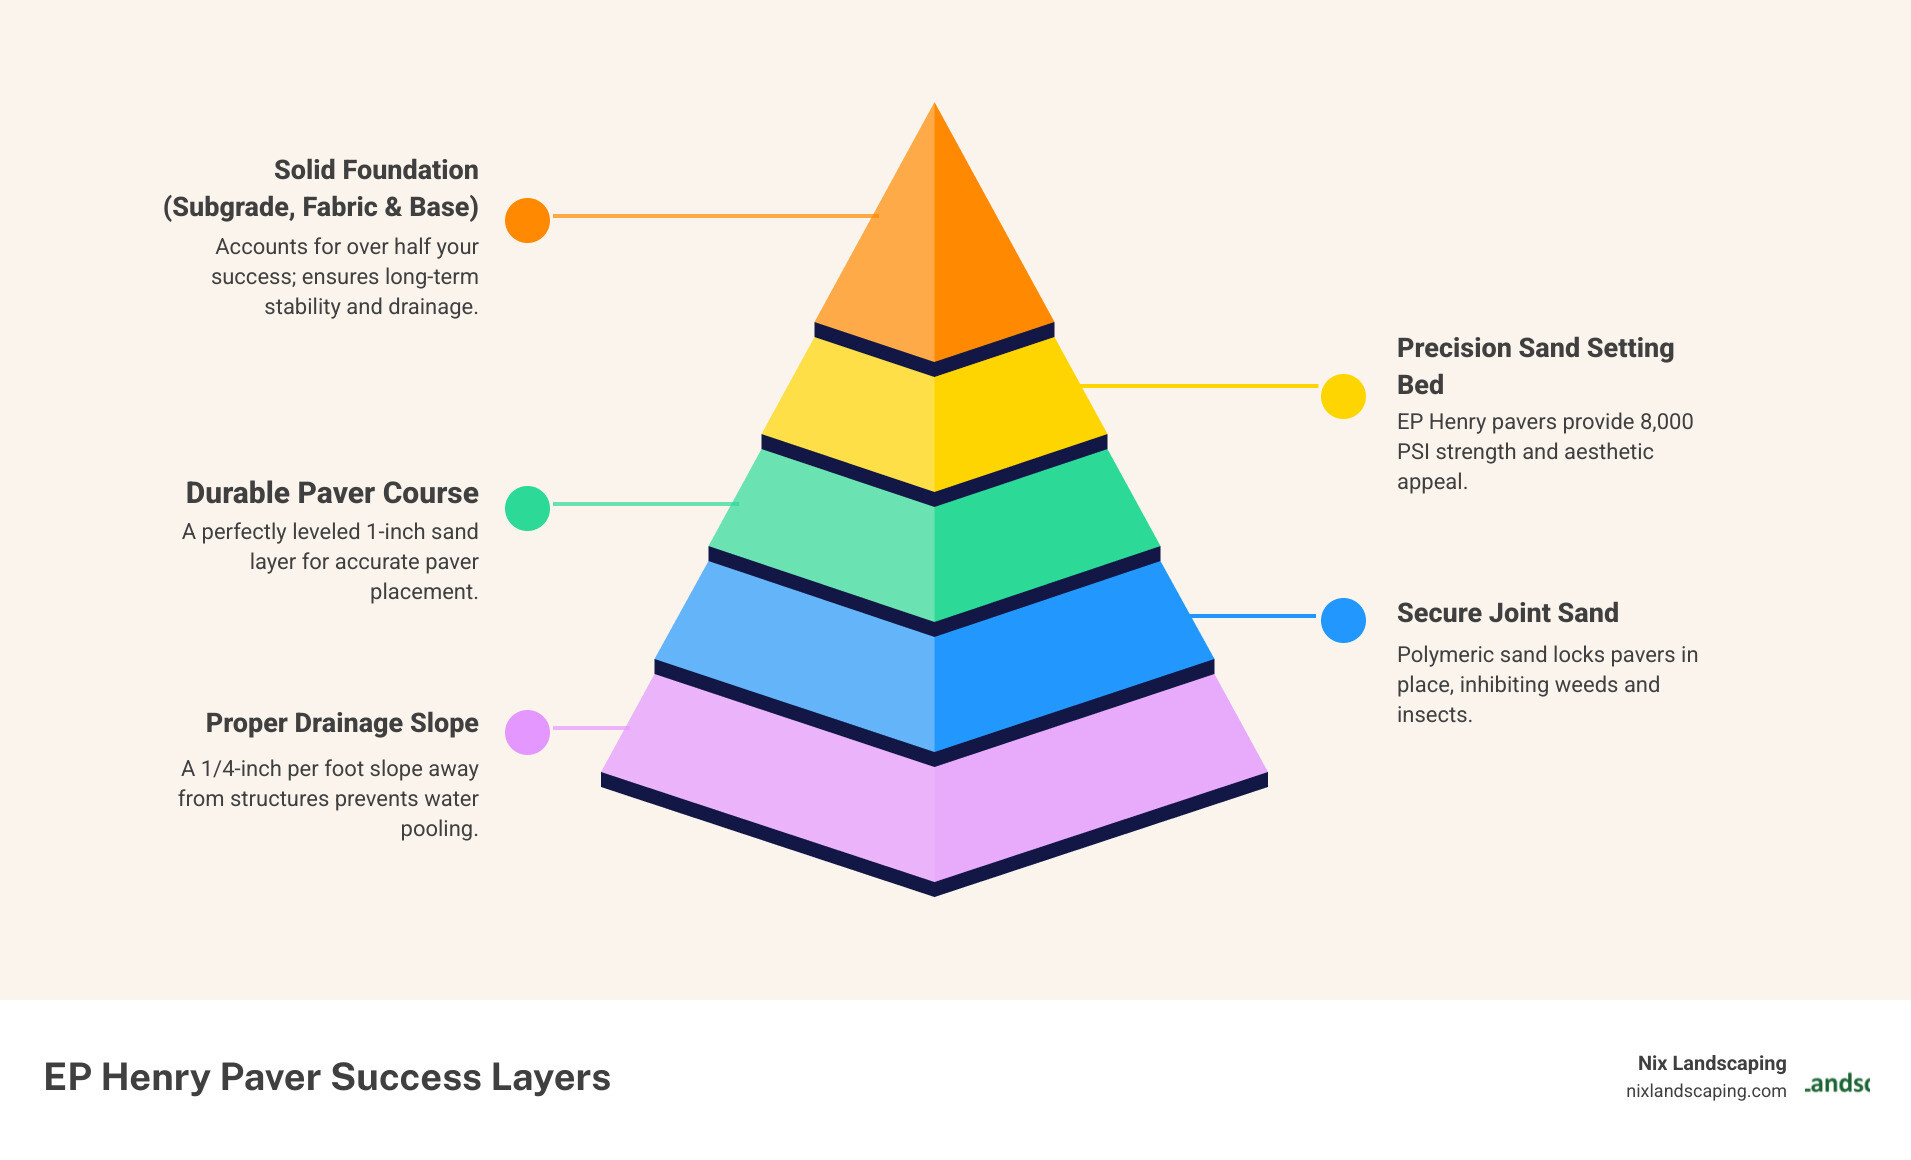
Common ep henry paver installation vocab:
Phase 1: Planning Your Perfect Paver Project
Picture this: you’re sipping your morning coffee, looking out at your backyard, and instead of that boring concrete slab or patchy grass, you see a gorgeous paver patio that makes your neighbors a little jealous. That dream starts right here, with smart planning for your EP Henry paver installation.

Let’s start with design and layout – the fun part where your imagination gets to run wild. Close your eyes and think about how you’ll actually use this space. Will it be your morning coffee sanctuary? A place to host epic barbecues? Or maybe a simple walkway that makes guests say “wow” as they approach your front door?
Here’s a pro tip from years of EP Henry paver installation projects: grab some stakes and string, then mark out your proposed area. Plop your outdoor furniture right in the middle and walk around it. You’ll quickly find if you need 4 feet of clearance around that dining table or if your grill area needs more breathing room. Trust me, it’s much easier to adjust your plan now than after you’ve moved tons of stone! For more creative ideas on maximizing your outdoor space, check out our Patio Landscape Design page.
Now comes the math part – calculating square footage. Don’t worry, it’s not as scary as it sounds! For rectangular areas, simply multiply length times width. Got a funky-shaped space? Break it down into smaller rectangles and squares, then add them all up.
Once you have your total square footage, here’s the golden rule: add 3-5% extra for cuts and waste. I’ve seen too many DIYers run out of pavers on the last day because they calculated to the exact square foot. Those edge cuts and the occasional broken paver add up quickly.
Before you get too excited and start digging, we need to talk about the not-so-fun but absolutely crucial safety and legal checks.
Calling 811 before you dig isn’t just a good idea – it’s the law in most places, and it’s completely free. These folks will come out and mark exactly where your gas, electric, water, and cable lines are buried. Trust me, hitting a gas line with your shovel is not the kind of excitement you want in your life.
You’ll also want to check on local permits and HOA rules. Here in Fishers, some paver projects need permits, especially if you’re changing drainage patterns or building near property lines. Permit costs typically run $200 to $1,000, so factor that into your budget. And if you have a homeowner’s association, give them a heads up – it’s much easier to get approval upfront than to deal with angry letters later.
Essential Materials for your EP Henry Paver Installation
Think of this like gathering ingredients for your favorite recipe – except instead of making dinner, you’re creating an outdoor space that’ll last decades. The quality of materials you choose directly impacts how your finished project looks and performs.
EP Henry Pavers are obviously the star of the show. These aren’t your average concrete blocks – they’re engineered to handle freeze-thaw cycles, heavy loads, and still look beautiful after years of use. Visit an authorized dealer to see samples in person, because colors can look different in various lighting.
Your modified stone base (2A or crusher run) is like the foundation of a house – nobody sees it, but everything depends on it. This blend of crushed stone and fine particles compacts into a rock-solid, yet permeable foundation that keeps your pavers stable for decades.
Coarse concrete sand creates the perfect bedding layer for your pavers. Here’s where many DIYers go wrong – don’t use stone dust or screenings! They might seem similar, but they trap water and can cause problems down the road.
Geotextile separation fabric might sound fancy, but think of it as insurance for your project. This fabric prevents your carefully prepared base from mixing with the soil underneath, especially important if you have clay soil that loves to expand and contract.
Plastic or concrete edge restraint keeps everything locked in place, while steel spikes anchor it firmly. Polymeric sand is the magic ingredient that gets swept into joints and hardens when water hits it, keeping weeds out and pavers locked together.
For estimating quantities, 3-5% waste factor we talked about. One ton of base material covers roughly 100 square feet at 2 inches thick. EP Henry Polysand typically covers about 75 square feet for standard pavers. For precise calculations and detailed guidance, EP Henry’s detailed DIY workbook is an invaluable resource.
Tools You’ll Need for the Job
You don’t need a contractor’s entire arsenal, but having the right tools makes the difference between a weekend warrior success story and a frustrating mess.
Your shovel and wheelbarrow will be your best friends during excavation – invest in a quality wheelbarrow, your back will thank you. A tape measure and level ensure everything stays straight and properly sloped for drainage.
A rubber mallet gently taps pavers into place without damaging them, while a hand tamper or plate compactor handles the heavy-duty compaction work. For anything larger than a small walkway, rent a plate compactor – it’s worth every penny and saves hours of backbreaking work.
You’ll need a diamond blade wet saw for clean, precise cuts around edges and obstacles. Always use proper safety glasses and gloves, plus a respirator when cutting. A push broom sweeps sand into joints, and screed rails (simple conduit or 2x4s) help create that perfectly level sand bed.
Having quality tools isn’t just about efficiency – it’s about achieving professional results and keeping yourself safe throughout your EP Henry paver installation project.
The Complete EP Henry Paver Installation Process
This is where all your planning transforms into reality! After gathering materials and tools, it’s time to roll up our sleeves and create something beautiful. The installation process follows a logical sequence – each step builds on the previous one, so patience and attention to detail here will reward you with decades of enjoyment.
Step 1: Excavation and Base Preparation
Here’s where we separate the dreamers from the doers! EP Henry paver installation success starts underground, and this foundation work is absolutely critical. I’ve seen too many DIY projects fail because someone rushed through this phase.
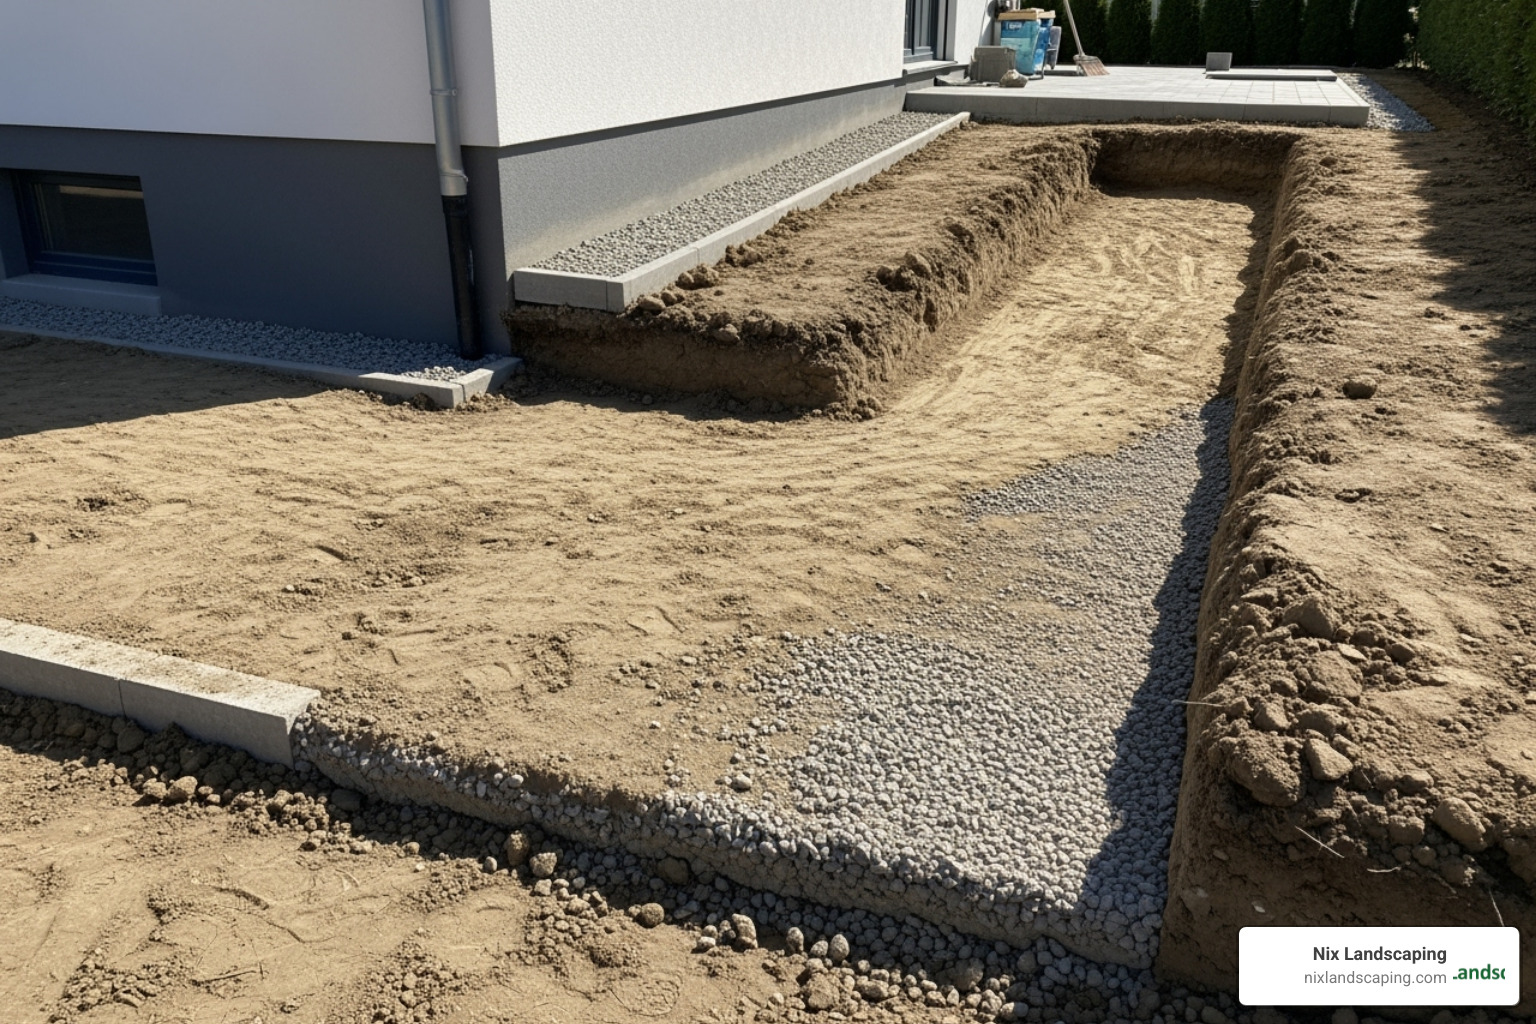
Marking the project area comes first – use those stakes and string from your planning phase to outline exactly where you’ll be digging. Double-check your measurements now, because once you start excavating, changes get expensive fast!
Excavation depth calculation requires some simple math. Take your paver thickness (usually 2⅝ inches for standard EP Henry pavers), add your base depth, and add one inch for the sand bedding layer. So for a typical patio, you’re looking at 2⅝ + 6 + 1 = 9⅝ inches total excavation depth.
The recommended base depth isn’t negotiable – 6 inches for patios and walkways handles foot traffic beautifully, while 10-12 inches for driveways supports vehicles without settling. I’ve seen homeowners try to save money by skimping on base depth, only to watch their beautiful pavers sink and shift within a few years.
Creating a ¼-inch per foot slope for drainage might seem picky, but water is your paver system’s biggest enemy. This gentle slope directs water away from your house foundation and prevents those annoying puddles that freeze in winter. One of our DIY customers learned this lesson when they finded a low spot that collected water after every rain – a small oversight that caused big headaches!
Compacting the subgrade soil comes next. Fire up that plate compactor and make several overlapping passes across the entire excavated area. The soil should feel firm underfoot when you’re done. This step prevents future settling that could make your pavers uneven.
Finally, laying down geotextile fabric acts like insurance for your investment. Roll it out over the compacted subgrade, overlapping seams by 6 inches and extending it slightly up the excavation sides. This fabric prevents your expensive aggregate base from mixing with the underlying soil, especially important if you’re dealing with clay soils common in our area.
Step 2: Building a Solid Foundation
Now we’re building the backbone of your EP Henry paver installation! Think of this aggregate base as the unsung hero – nobody sees it once you’re done, but it’s what keeps everything looking perfect for decades.

Adding modified stone base in 2-inch layers (called “lifts” in contractor speak) is the secret to a rock-solid foundation. Resist the temptation to dump all your stone at once – it simply won’t compact properly. Spread each 2-inch layer evenly, then lightly mist it if the stone seems dusty or dry.
Compacting each lift thoroughly means making multiple passes with your plate compactor, overlapping each pass by about 4 inches. The stone should stop moving and feel solid under the compactor’s weight. You’ll hear the difference too – loose stone sounds hollow, while properly compacted base has a solid, dense sound.
Spreading a 1-inch layer of coarse concrete sand creates the bedding layer where your pavers will rest. This is crucial: use coarse concrete sand only – never stone dust or screenings, which trap water and cause problems later. And here’s a key point that trips up many DIYers: don’t compact this sand layer! It needs to stay loose so your pavers can settle into it properly.
Screeding the sand to create a perfectly flat surface requires a bit of technique. Set your screed rails (metal conduit works great) parallel to each other, then drag a straight 2×4 across them to level the sand. The result should be a smooth, consistent surface that’s exactly one inch thick. Take your time here – any imperfections will show up in your finished paver surface.
For the most detailed technical specifications, always reference the Official EP Henry Installation Guidelines to ensure you’re following best practices.
Step 3: Laying the Pavers
This is the fun part! After all that prep work, you finally get to see your vision taking shape. EP Henry paver installation becomes satisfying and visual at this stage, but don’t let excitement override careful technique.
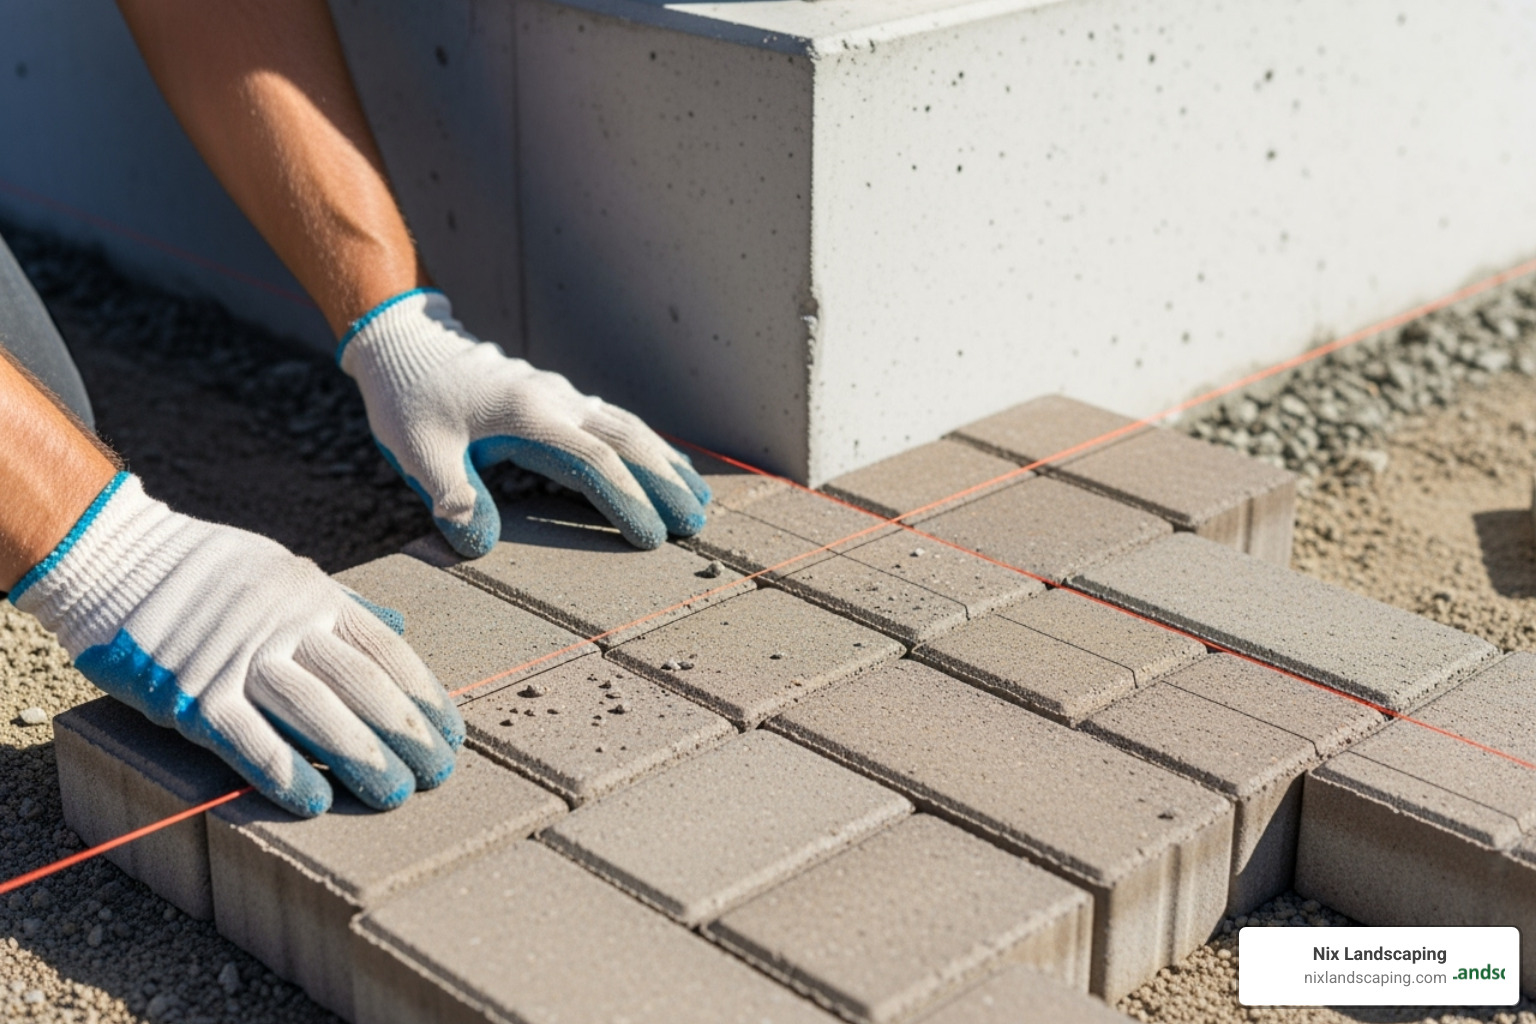
Starting from a 90-degree corner gives you the best foundation for straight, professional-looking lines. Use your house wall, an existing structure, or create a perfect corner with string lines. This reference point keeps everything square as you work outward.
Working from on top of the laid pavers protects that perfectly screeded sand bed you just created. Never walk on the sand – always step on completed pavers and reach forward to place the next ones. It might feel awkward at first, but you’ll quickly get the hang of it.
Using the “click-and-drop” method means lowering each paver straight down into position, then giving it a gentle wiggle to settle it into the sand. Avoid sliding or dragging pavers, which disturbs the sand bed and creates uneven spots. A light tap with your rubber mallet can help seat stubborn pavers, but don’t get too aggressive.
Maintaining straight lines and patterns requires constant attention. String lines stretched across your work area act as guides – check them frequently and adjust as needed. For driveways, the herringbone pattern provides superior strength and load distribution under vehicle traffic.
Making cuts with a wet saw for edges and curves becomes necessary as you approach borders and obstacles. Always wear safety glasses and a respirator when cutting – concrete dust is no joke. Try to avoid cutting pieces narrower than 4 inches, as they can shift and look unprofessional. The wet saw might seem intimidating at first, but you’ll master it quickly with practice.
For additional insights on creating beautiful pathways, check out our guide on Walkway Pavers Installation.
Step 4: Finishing Touches
You’re in the home stretch! These final steps transform your loose pavers into a locked, integrated system that will serve you for generations.
Installing edge restraints on all open sides prevents lateral movement that could destroy your beautiful pattern over time. These plastic or concrete barriers might seem like minor details, but they’re absolutely essential. Secure plastic restraints with steel spikes every 1.5 feet, driving them firmly into the compacted base until the restraint sits snugly against the pavers.
Making the first pass with a plate compactor seats the pavers firmly into the sand bedding and begins the interlocking process. If your pavers have textured or tumbled surfaces, always use a protective mat – a piece of geotextile fabric or rubber mat prevents scuffing. Make overlapping passes across the entire surface, listening for that solid sound that indicates proper seating.
Spreading polymeric sand over the dry surface requires perfect timing – your pavers must be completely dry, and no rain should be forecast for several hours. This isn’t regular sand; it contains polymers that harden when activated with water. Spread it generously over the entire surface.
Sweeping sand into the joints takes patience and thoroughness. Use a push broom to work the polymeric sand into every joint, ensuring they’re completely filled. Don’t rush this step – every gap needs to be packed full for the system to work properly.
Compacting again to lock pavers with a second pass of the plate compactor vibrates the polymeric sand deep into the joints. You might need to add more sand to joints that settle during this process – that’s normal and expected.
Gently misting with water to activate the sand is the final step. Use a fine spray setting on your garden hose, avoiding strong jets that could wash sand from the joints. The water activates the polymers, creating a semi-rigid bond that locks everything together. Follow the manufacturer’s drying time recommendations – usually 24 hours before heavy use.
One DIY customer shared their near-disaster when unexpected rain threatened their freshly applied polymeric sand – they ended up scrambling with tarps at midnight! Check that weather forecast carefully before opening those poly sand bags.
Common Mistakes and FAQs
Let’s be honest – even the most carefully planned EP Henry paver installation can hit some bumps along the way. I’ve seen these same mistakes countless times over the years, and the good news is they’re all completely avoidable with a little knowledge upfront.
Common Pitfalls in an EP Henry Paver Installation
The biggest mistake I see homeowners make is inadequate base depth. I get it – nobody wants to dig deeper than necessary or buy more stone than they think they need. But trying to save a few dollars on excavation or base material will cost you dearly down the road. Your beautiful patio will start settling unevenly, creating trip hazards and that frustrating “wavy” look that screams “amateur installation.” Stick to the rules: 6 inches for patios and walkways, 10-12 inches for driveways. No shortcuts here.
Forgetting the drainage slope is another heartbreaker. That seemingly tiny 1/4-inch per foot slope away from your house isn’t just a suggestion – it’s your insurance policy against water pooling on your new surface or, worse yet, flowing toward your foundation. I’ve had to help homeowners fix drainage issues that could have been prevented with proper planning from day one.
Then there’s insufficient compaction. This one makes me cringe because it’s so preventable. Whether we’re talking about your subgrade soil, each lift of aggregate base, or the final paver surface, every layer needs thorough compaction. Skipping this step or rushing through it means your surface will settle unevenly over time. Trust me, renting that plate compactor is worth every penny.
Here’s a mistake that can ruin your entire weekend: applying polymeric sand in wet conditions. I can’t tell you how many panicked calls I’ve gotten from DIYers who checked the weather forecast too late. Polymeric sand absolutely must go down on completely dry pavers, and you need at least 24 hours of dry weather afterward for it to cure properly. Apply it when it’s damp or with rain coming, and you’ll end up with hazy, stained pavers or loose joints that defeat the whole purpose.
Finally, not ordering 3-5% extra material for cuts and waste might seem like smart budgeting, but it’s actually penny-wise and pound-foolish. Running out of pavers mid-project means work stops, you pay premium prices for small quantities, and there’s no guarantee the new batch will match perfectly. Always order extra – you can return unopened materials, but you can’t return lost time and frustration.
Frequently Asked Questions
Over the years, I’ve answered these questions more times than I can count. Let me share the most common ones and give you the straight answers.
Can I install EP Henry pavers over an existing concrete patio?
Yes, it’s technically possible, but I always tell homeowners it’s not our preferred method for a long-term solution. You’re dealing with two main challenges here. First, your new paver surface will raise the grade by about 3 inches – that’s the paver thickness plus the sand bedding layer. This can create real headaches with doorways, existing steps, and your surrounding landscaping.
More importantly, your pavers will follow any movement in that underlying concrete slab. Concrete cracks and shifts during freeze-thaw cycles, and unfortunately, your beautiful new pavers will show every bit of that movement. For the best long-term results, we always recommend full excavation and a proper new base.
Will weeds grow between my pavers?
This is probably the question I hear most often, and I have great news for you. When you use polymeric sand correctly during your EP Henry paver installation, weed growth becomes much less of an issue. Weeds typically sprout from seeds that blow into regular joint sand, but polymeric sand hardens when activated with water, creating a barrier that makes it very difficult for weeds to take root.
The key word here is “correctly” – the sand needs to be completely swept into the joints, compacted, and then gently misted according to the manufacturer’s instructions. Do this right, and you’ll also prevent ants and other insects from making homes in your joints. If the occasional stubborn weed does appear, a simple spot treatment with vegetation killer takes care of it without harming your pavers.
What is the white film (efflorescence) on my new pavers?
Don’t panic – this white, powdery film is completely normal and harmless! Efflorescence happens when natural salts in the concrete migrate to the surface and react with carbon dioxide in the air. It’s not a product defect, and it won’t damage your pavers in any way.
The best part? It’s temporary. Weather and time will naturally wash away this white film, usually within the first year. If you’re impatient (and who isn’t when they have a beautiful new patio?), you can find specialized efflorescence cleaners at most hardscape supply stores to speed up the process.
Your Beautiful New Outdoor Space
Completing an EP Henry paver installation is truly one of those home improvement projects that fills you with pride every time you step outside. There’s something incredibly satisfying about changing a patch of yard into a beautiful, functional outdoor living space – especially when you’ve done it with your own hands. From that first exciting sketch on paper to the final misting of polymeric sand, you’ve created something that will serve your family for decades to come.
The investment you’ve made in quality EP Henry products ensures your new patio, walkway, or driveway isn’t just beautiful today – it’s built to last. These pavers will weather countless seasons, family gatherings, and daily use while maintaining their strength and appearance. The value you’ve added to your home is substantial, but more importantly, you’ve created a space where memories will be made.
Now, let’s be honest – we know this guide makes the process sound manageable, and it absolutely is for motivated DIYers. But we also understand that not everyone has three weekends to spare, access to a plate compactor, or the desire to wake up feeling like they’ve been hit by a truck. There’s no shame in recognizing that a large-scale paver project is serious physical work.
At Nix Landscaping, we’ve helped countless Fishers homeowners bring their outdoor visions to life without the backache, the equipment rental costs, or the learning curve that comes with DIY installation. Our team has the specialized tools, the experience to avoid common pitfalls, and frankly, the muscle memory that makes even complex installations look effortless.
Whether you’ve tackled this project yourself or you’re considering professional installation from the start, the end result is the same – a stunning outdoor space that improves your home and your lifestyle. Ready to explore how we can help transform your outdoor space? Explore our residential and commercial hardscaping services today and let’s discuss bringing your vision to life.

