
Introduction: Your Guide to a Serene Backyard Oasis
Are you ready to learn how to install a pondless water feature in your backyard? It might seem complex, but with the right steps, you can create a beautiful, low-maintenance oasis.
Here’s a quick overview of the installation process:
- Plan & Excavate: Dig the basin for the hidden reservoir.
- Install Liner & Reservoir: Lay protective liner and assemble the water storage system.
- Build Waterfall & Plumb: Construct the rock formation and connect the pump.
- Seal & Direct Water: Use foam to guide water flow over the rocks.
- Fill & Enjoy: Add water, test, and start enjoying your new feature.
A pondless waterfall is a recirculating water feature without an open body of water. The water flows over rocks and then “magically disappears” into a hidden underground reservoir. From there, a pump sends it back to the top of the waterfall.
This design offers soothing sounds and visual appeal, like a traditional waterfall, but with much lower maintenance. It’s safe for kids and pets, saves space, and can even attract local birds and wildlife. It’s perfect for busy homeowners looking for a tranquil improvement without the upkeep of a pond.
As Kyle Nix, owner of Nix Landscaping, I’ve spent years changing outdoor spaces, including many projects on how to install a pondless water feature. My team and I blend innovative vision with a deep understanding of natural aesthetics to create stunning outdoor environments.
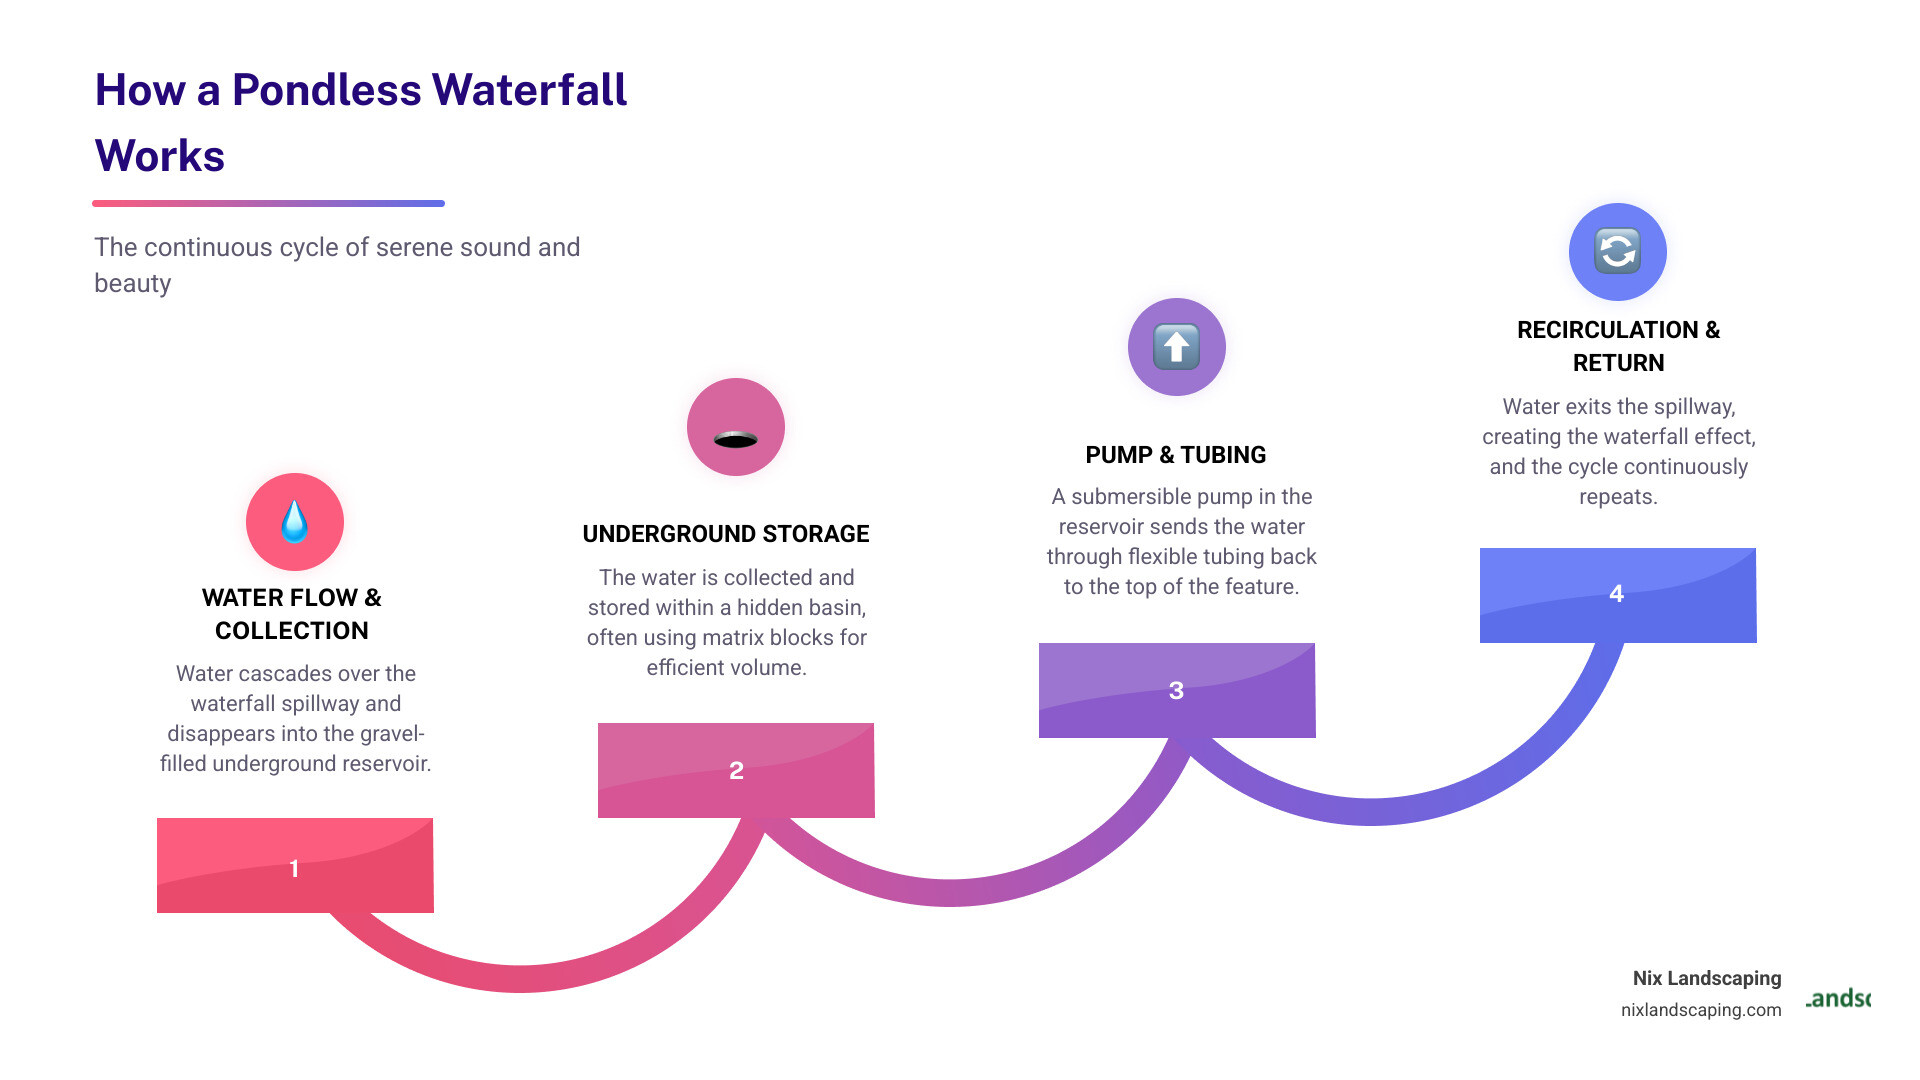
How to install a pondless water feature word guide:
Planning Your Perfect Pondless Waterfall
Before we even think about digging, careful planning is absolutely key to creating a successful and enjoyable pondless waterfall. This is where we lay the groundwork for a feature that truly improves your outdoor living space. It’s like setting the stage for your own backyard symphony!
Location Selection
When choosing the perfect spot for your pondless waterfall, we want to make sure it brings you the most joy and impact. Think of these points as finding its “sweet spot”:
- Visibility: Where will you enjoy it the most? Can you see it from your patio, deck, or even through a window from inside your home? Step back and look at the area from different angles. A well-placed waterfall instantly becomes a beautiful focal point, bringing peace into your daily life.
- Sound: The gentle sound of flowing water is one of the best parts of a pondless feature. Consider how the sound will carry. Do you want a soft babble for quiet moments, or something louder to help mask street noise? A waterfall with a 10-inch or greater drop can be very effective for masking sounds, while a two to four-inch drop offers a more gentle, babbling brook sound.
- Proximity to Power: Your pump needs electricity to run! We always check for easy access to a GFCI (ground fault circuit interrupt) protected outlet within 5 to 20 feet of where the basin will be. This avoids the need for extension cords, which aren’t safe for outdoor water features.
- Avoiding Utility Lines: This is super important! Before any digging starts, always call 811 a few days beforehand. This free service marks underground utility lines (like gas, water, electric, and cable). It prevents dangerous and costly accidents, so don’t skip this step for any digging project!
- Space and Height: How much room do you have? And how tall do you dream your waterfall will be? Even a small pondless water feature can create a lovely waterfall height of 19.5 inches on flat ground. For larger, more dramatic falls, you might need more space or consider using the excavated soil to build a berm. This helps create the extra height for a truly stunning waterfall.
Choosing a Style
Pondless waterfalls offer amazing design freedom! You can create anything from a little bubbling rock feature to a wide, multi-tiered stream. Take some time to research different designs. This helps us tailor the feature to your personal taste, your budget, and the current look of your yard. We can aim for a natural look by changing the height and width of the stream and falls, using different sizes and types of rocks to blend it seamlessly into your landscape.
Determining Size and Scale
The size of your pondless waterfall should feel right for your yard. Even a small waterfall can make a big impact in just about any space! We’ll figure out the desired width of your waterfall, because this directly affects the size of the pump you’ll need. For a standard flow, plan on 100 gallons per hour (GPH) per inch of waterfall width. If you prefer a more splashy, lively effect, aim for 200 GPH per inch. This ensures your feature flows beautifully without looking like a fire hose!
DIY vs. Professional Installation
Wondering how to install a pondless water feature yourself? It can be a really rewarding project, especially for smaller, kit-based features. A simple DIY pondless water feature can even be built in just an afternoon or a weekend! It might cost as little as $75-$100, or around $200 for a solar-powered option. DIY waterfall kits are designed to make the process easier, providing all the main parts and saving you time, money, and headaches.
However, for bigger, more detailed designs, or if you simply want a totally stress-free experience, professional installation offers huge benefits. A professionally installed pondless waterfall can range from $20,000 to $50,000, depending on how big it is, the materials used (like beautiful flagstone), and the labor involved. This might include costs for things like pump and electrical work ($2,000), the liner ($500), and at least $2,000 for rocks (flagstone can be about $250 per ton). Large projects often need heavy machinery like excavators and skid steers, which can add to the cost.
For truly custom designs or if you want a perfect, seamless integration into your landscape, our team at Nix Landscaping offers expert water feature installation services. We make sure your project goes smoothly from your first idea to the finished waterfall. You can find More info about water feature installation services on our website.
Budgeting Your Project
Your budget will definitely guide the size and complexity of your pondless waterfall. When planning, think about more than just the initial material costs. Consider potential equipment rental (which can be around $1500 per day for heavy machinery) and any specialized labor if you’re not doing it all yourself. Planning ahead helps you avoid any unexpected expenses down the road.
Essential Tools and Materials
Having all your tools and materials ready before you start digging will make the installation process so much smoother. It’s like having all your ingredients prepped before you start cooking!
Here’s what you’ll typically need:
Tools:
- Shovel
- Wheelbarrow
- Level (a 4ft level is super helpful!)
- Rubber Mallet
- Utility Knife
- Caulking Gun (for that special waterfall foam)
- Garden Hose
- Safety Glasses
- Gloves
- Tubing Cutters or PVC Saw
- Screw Driver or Nut Driver
Materials:
- Pondless waterfall kit (a great option for DIYers!)
- EPDM rubber liner (45-mil is a common, durable choice)
- Geotextile underlayment (this protects your liner from punctures)
- Submersible pump (make sure it’s sized correctly for your waterfall’s flow and height)
- Pump vault (essential for protecting your pump and making it easy to reach)
- Water storage matrix blocks (like AquaBlox or Eco-Blox, they hold much more water in your reservoir than just gravel!)
- Flexible PVC pipe (the right diameter for your pump and spillway)
- Waterfall spillway (or weir, this creates a smooth sheet of water)
- Boulders and river rock (you’ll want various sizes for looks and structure)
- Waterfall foam sealant (black expanding foam, crucial for directing water flow exactly where you want it)
To Kit or Not to Kit?
When figuring out how to install a pondless water feature, a big decision is whether to buy a complete DIY waterfall kit or to find each part individually.
DIY waterfall kits are incredibly convenient. They take away the guesswork of choosing each piece yourself, saving you time, money, and headaches. These kits usually include the pump, liner, underlayment, pump vault, and sometimes even a waterfall spillway and some basic plumbing. They’re designed to be easy to install, often making a smaller feature doable in just one day.
Sourcing individual components gives you the most freedom to customize. This path is for those who have a very specific design in mind or want to pick out higher-quality parts for different areas of the system. However, it does mean you’ll need a deeper understanding of how each part works together.
No matter if you choose a kit or individual parts, it’s super important to correctly match your pump to your waterfall size. This means calculating the needed GPH (gallons per hour) based on your waterfall’s width and the “head” or lift (how high and how far horizontally the water needs to travel). For every 10 feet of horizontal pipe, you add about 1 foot of vertical head pressure that your pump needs to overcome.
Calculating your liner size is also vital. You’ll need enough to cover the entire basin area, the waterfall stream, and extend beyond the edges for a secure, watertight seal. It’s always a good idea to get a slightly larger liner than you think you’ll need – better safe than sorry!
How to Install a Pondless Water Feature: A Step-by-Step Guide
Now that we’ve planned our perfect water feature and gathered all our supplies, it’s time to get our hands dirty! This is the core of how to install a pondless water feature.
Step 1: Excavation and Site Preparation

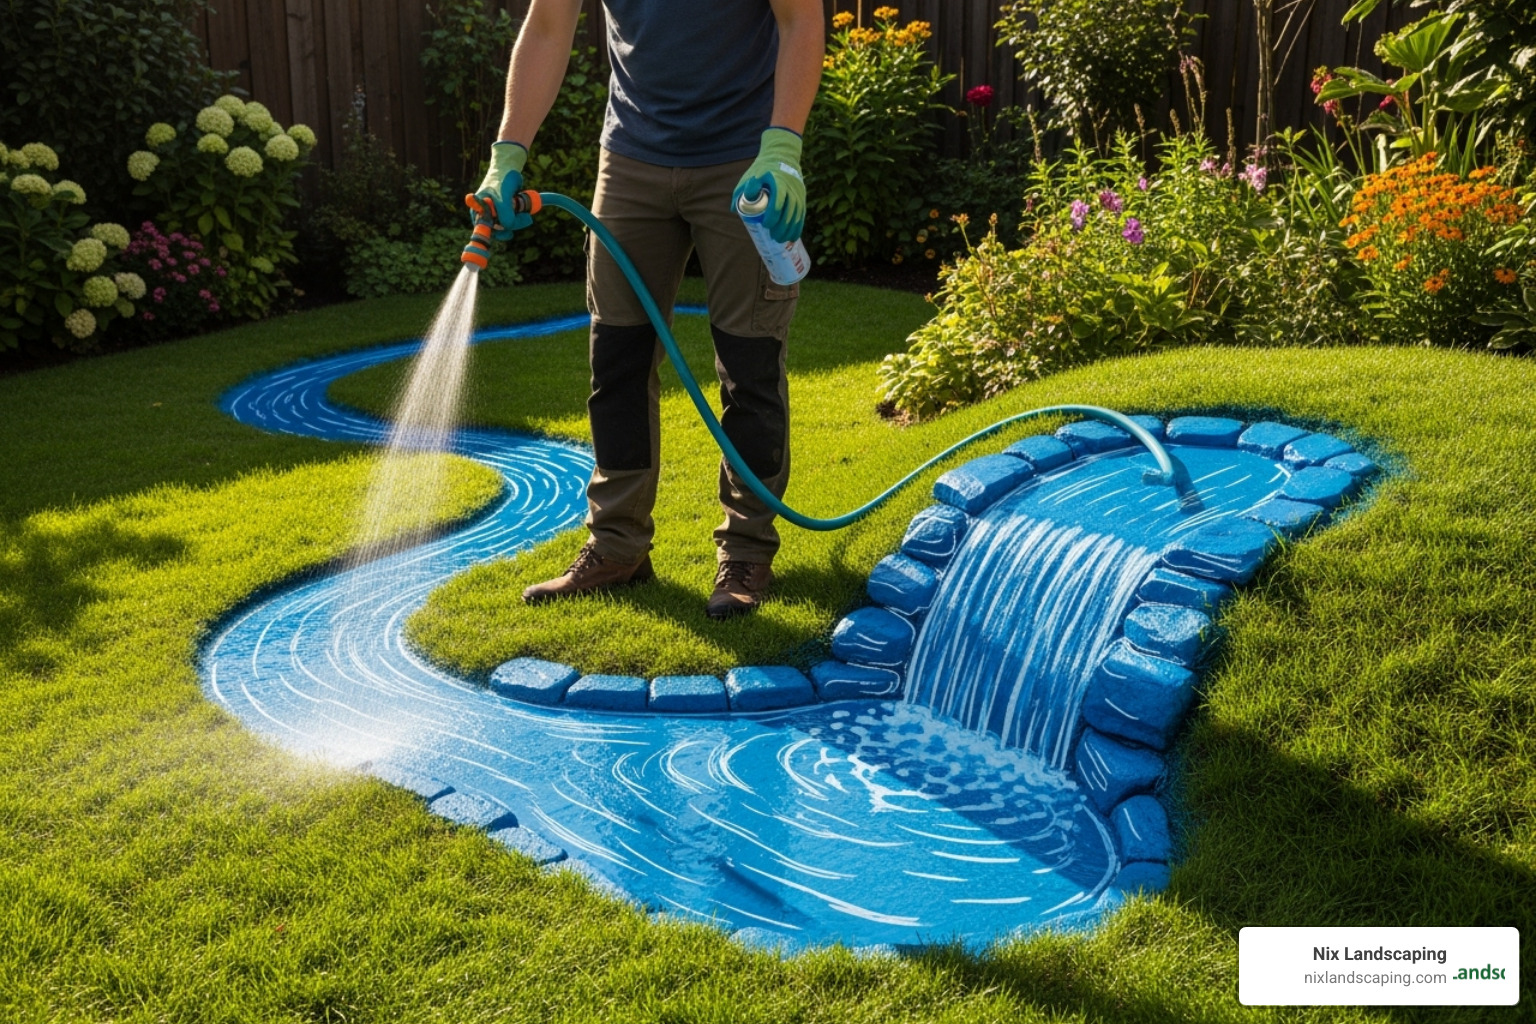
- Marking the Layout: First, we use a garden hose or landscape marking paint to outline the proposed area for your pondless waterfall, including the basin and the path of the stream. This allows us to visualize the design and make any adjustments before we dig.
- Digging the Basin: We begin by excavating the main basin area, which will house the hidden reservoir. While some suggest a maximum depth of 24 inches for the basin, the key is to ensure it’s large enough to hold all the water when the pump is off, plus accommodate the pump vault and water storage matrix blocks.
- Creating a Deeper Section for the Pump Vault: Within the main basin, we dig a slightly deeper section specifically for the pump vault. This ensures the pump sits at the lowest point, allowing it to continuously draw water even if the water level drops slightly due to evaporation.
- Using Excavated Soil for a Berm: Don’t let all that soil go to waste! We use the excavated material to build a berm or liftd area, which will form the starting point or “mountain” for your waterfall. This helps create natural elevation for a more dramatic water flow.
- Ensuring Basin Edges Are Level: It’s critical to ensure the basin edges are level. We use a level (or a transit for larger projects) to check this. This prevents water from spilling over the sides of the liner and ensures proper recirculation.
- Removing Sharp Rocks and Roots: As we dig, we carefully remove any sharp rocks, roots, or other debris that could puncture the liner. This step is an essential “insurance policy” for the longevity of your water feature.
Step 2: Installing the Reservoir and Plumbing
This is where the magic of the “disappearing” water begins.
- Laying Underlayment: Once the basin is dug and cleared, we lay down a layer of geotextile underlayment. This soft, protective fabric acts as a cushion, shielding the rubber liner from any remaining sharp objects or uneven ground.
- Placing the Rubber Liner: Next, we carefully unroll and position the EPDM rubber liner over the underlayment, conforming it to the shape of the basin and extending it up the sides and over the edges. We leave plenty of excess liner around the perimeter at this stage – we won’t trim it until the very end!
- Installing the Pump Vault: We place the pump vault in the deepest part of the basin. The pump vault is crucial; it protects the pump from debris, makes it easy to access for maintenance, and ensures it stays submerged.
- Assembling Water Storage Matrix Blocks: Inside the basin, around the pump vault, we assemble and stack the water storage matrix blocks (AquaBlox or Eco-Blox). These structural components create a large, stable void for water storage, allowing for significantly more water volume than just gravel alone.
- Connecting the Pump to Flexible PVC Pipe: We place the submersible pump inside the pump vault and connect it to the flexible PVC pipe. We use a primer and PVC glue for a strong, watertight seal, holding the connection for at least 60 seconds.
- Running the Pipe to the Top of the Waterfall: We run the flexible PVC pipe from the pump vault, up the side of the basin, and along the path of your planned waterfall to the very top, where the water will begin its journey. We try to conceal the pipe as much as possible behind rocks or within the berm.
- Backfilling Around the Reservoir: Once the pump vault and matrix blocks are in place, we carefully backfill around them with soil, ensuring everything is stable and level. We then cover the matrix blocks and pump vault with river rock or gravel, allowing water to filter through but concealing the mechanical components. Remember to thoroughly rinse all gravel before adding it to prevent dirt and sand from clogging your reservoir and potentially burning out your pump.
Step 3: How to Install a Pondless Water Feature’s Waterfall
This is where your vision truly comes to life, as we sculpt the waterfall’s unique character.

- Building from the Bottom Up: We construct the waterfall structure by layering rocks and boulders, starting from the base and working our way up. This ensures stability and a natural appearance.
- Placing Large Anchor Boulders: We strategically place large anchor rocks and boulders, especially at the top of the waterfall, to create a solid foundation and define the main drops. We use a rubber mallet to pack dirt and gravel tightly around stones to hold them in place.
- Creating Shelves and Drops for Water Flow: We arrange rocks to create natural-looking shelves, ledges, and drops that will guide the water flow. We aim for varied textures and heights to make the waterfall appear as natural as possible.
- Setting the Waterfall Spillway: If using a pre-fabricated waterfall spillway (or weir), we position it securely at the very top of the waterfall structure. This component is designed to create an even sheet of water, preventing it from coming out with the force of a fire hose.
- Securing the Liner to the Spillway: We carefully attach the rubber liner to the waterfall spillway using appropriate fittings, sealant, and clamps to ensure a watertight connection. This prevents water from escaping behind the waterfall.
- Concealing the Plumbing Pipe Behind Rocks: We skillfully hide the flexible PVC pipe behind and between the rocks of the waterfall structure. The goal is for the water to appear as if it’s naturally emerging from the landscape.
Step 4: Sealing, Stacking, and Perfecting the Flow
This crucial step ensures that all the water stays within the system and flows beautifully over your carefully placed rocks.
- Using Waterfall Foam: This is where black expanding waterfall foam comes in handy. Water loves to find the path of least resistance, and without foam, it will often disappear behind your rocks instead of flowing over them.
- Filling Gaps Between Rocks: We apply the waterfall foam into any gaps or crevices between the rocks that are not meant to have water flowing through them. This forces the water to flow over the face of the rocks, creating the desired visual and sound effects.
- Directing Water Over Rock Faces: By strategically applying foam, we can direct the water exactly where we want it, ensuring a continuous, aesthetically pleasing flow over your waterfall.
- Preventing Water Loss: The foam also acts as a sealant, preventing water from seeping out of the system and reducing the need for constant refilling.
- Layering Smaller Rocks and Gravel: Once the foam has cured, we fill any remaining visible gaps with smaller river rocks and gravel. This helps to conceal the foam, create a more natural look, and further secure the rockwork.
- Creating a Natural Look: We arrange the smaller rocks and gravel around the edges of the liner and within the stream bed to blend the feature seamlessly into the surrounding landscape. If you’re building a retaining wall, you can incorporate the waterfall into its design. We have more information on More info on building a retaining wall with a water feature.
Finishing Touches and Long-Term Care
Congratulations! You’ve done the heavy lifting of figuring out how to install a pondless water feature. Now it’s time for the exciting part: adding those final touches that make your new waterfall truly sparkle, and understanding the simple steps to keep it running beautifully for years to come.
Enhancing Your Waterfall’s Beauty
With the main construction behind you, it’s time to truly make your pondless waterfall a natural part of your landscape. First, we love to integrate the waterfall into its surroundings by landscaping with water-loving plants. Imagine lush ferns, vibrant hostas, or graceful irises thriving around your new feature. Choosing native species can make your garden feel even more connected to its environment. Don’t forget that mulching around these new plants helps keep moisture in and weeds out!
To extend the enjoyment of your waterfall into the evening, consider adding underwater LED lighting. These lights aren’t just practical; they transform your waterfall into a magical nighttime display, highlighting the flowing water and the texture of the rocks. Just be sure to carefully hide all cables under stones or within the landscape for a clean, professional look.
Beyond the functional gravel in your reservoir, you can use decorative gravel around the perimeter of your new feature. This adds another layer of visual interest and helps seamlessly blend the liner edges into your existing hardscape or softscape. It’s all about making it look like it’s always been there!
Finally, once you’ve filled the system with water, turned on the pump, and double-checked for any leaks (always good to be sure!), it’s time to carefully trim any excess liner. Leave just enough to be covered by soil, mulch, or those decorative stones for a polished finish. Don’t rush this step—wait until you’re absolutely certain the system is running perfectly and leak-free.
Ongoing Maintenance and Winterization
One of the best things about a pondless waterfall is how little maintenance it requires compared to a traditional pond. But a little regular care goes a long way in keeping that tranquil sound and beautiful flow.
The most frequent task you’ll have is regularly checking water levels. Water naturally evaporates, especially on hot, sunny days. So, just like topping off your car’s fluids, you’ll need to top off your reservoir periodically with a garden hose. For ultimate convenience, you can even install an automatic filling device – set it and forget it!
You’ll also want to remove leaves and debris that might fall into the basin or collect on your beautiful rocks. A simple skimmer net works wonders for this. And don’t forget to clean the pump intake every now and then. The pump is the heart of your waterfall, and its intake can sometimes get clogged with fine bits of debris. A quick inspection and cleaning will ensure optimal water flow and keep your pump happy and healthy.
For those of us in colder climates, like here in Fishers, IN, preparing for winter is important. Before the first hard freeze, you have a couple of options: you can either drain the entire system completely, or, if you really love the idea of a winter wonderland, use a de-icer to keep the water flowing. Regardless of your choice, it’s crucial to remove the pump and store it indoors. We recommend placing it in a bucket of water to keep its seals moist, preventing damage from freezing. If you have any decorative pottery around your waterfall, make sure to drain it too before winter sets in to prevent it from cracking in the cold.
How to Install a Pondless Water Feature and Troubleshoot Common Issues
Even with the best planning and installation, sometimes little quirks can pop up. Knowing how to install a pondless water feature also means knowing how to handle minor hiccups. Here’s a quick guide to common problems, their likely causes, and simple solutions:
| Problem | Likely Cause | Solution |
|---|---|---|
| Leaks | Punctured liner; Liner settling; Improperly sealed connections; Water splashing out of the system. | Inspect liner for tears (patch if found); Check connections to spillway/pipe for secure, watertight seals; Adjust rocks/flow to prevent excessive splashing outside the basin. |
| Low Water Flow | Clogged pump intake; Kinked or blocked pipe; Pump not sized correctly; Low water level in reservoir. | Clean pump intake screen; Check flexible PVC pipe for kinks or debris; Ensure pump’s GPH matches waterfall’s needs (if new issue, likely a clog); Top off water in reservoir. |
| Pump Stops Working | Power outage/tripped GFCI; Clogged impeller; Overheating due to low water; Pump failure. | Check GFCI outlet; Unplug and clean pump impeller; Ensure pump is fully submerged; If all else fails, pump may need replacement (check warranty). |
| Algae Growth | Excessive sunlight; Nutrient imbalance; Inadequate water movement. | Reduce sunlight (add plants, shade cloth); Remove organic debris (leaves, uneaten plant matter); Ensure good water circulation; Consider an algaecide (use sparingly). |

