
Illuminate Your Outdoor Space: The Magic of Light
There’s something truly magical about stepping into a beautifully lit outdoor space as evening falls. Outdoor lighting ideas don’t just brighten your yard—they transform it into an enchanting retreat that beckons you outside long after the sun has set.
I’ve seen countless homeowners’ faces light up (pun intended!) when they first experience their newly illuminated landscapes. The right lighting creates ambiance while serving the practical purpose of enhancing safety and security around your home.
Looking for inspiration to light up your outdoor living areas? Let me share some of our most popular lighting solutions that consistently delight our clients:
String lights draped above patios create an instant atmosphere of warmth and celebration—perfect for evening gatherings. For safe navigation, path lights spaced 10-15 feet apart guide footsteps along walkways while adding a gentle glow to garden edges. Want to showcase that magnificent oak or architectural detail? Uplights strategically placed can highlight your property’s most striking features.
Entrances become more welcoming with wall sconces that provide both illumination and style. For multi-level yards, step lights are essential for preventing trips and falls while adding a sophisticated touch. Well lights installed at ground level create dramatic effects when aimed at walls, plants, or water features.
Covered spaces gain personality with pendant lights hanging from pergolas or gazebos, while flood lights (typically 700-1300 lumens) provide that broader security lighting that keeps unwanted visitors at bay.
Effective outdoor lighting isn’t about randomly placing fixtures wherever there’s darkness. It’s about thoughtfully layering light to create depth and dimension. When done right, lighting extends your living space beyond your home’s walls and adds significant value to your property.
I’m Kyle Nix, owner of Nix Landscaping, and over the years I’ve helped countless homeowners throughout Fishers transform their ordinary yards into extraordinary nighttime landscapes. My approach to outdoor lighting ideas balances beauty with practicality—creating spaces that aren’t just stunning to look at but also functional and safe to use after dark.

Whether you’re looking to illuminate a commercial property, exploring creative LED applications, or seeking comprehensive lighting solutions, we’ve got specialized resources to help:
- Outdoor commercial lighting ideas for business owners
- Outdoor LED strip lighting ideas for creative applications
- Outdoor lighting solutions for comprehensive approaches
Let’s bring your outdoor spaces to life after dark—where beauty meets functionality under the gentle glow of thoughtfully placed lights.
Understanding the Fundamentals
When it comes to creating magical outdoor spaces, understanding lighting basics is like having the right map before starting a journey. A little knowledge goes a long way in helping you create a lighting design that’s both beautiful and practical—turning your yard into an extension of your home after dark.
The outdoor lighting world offers many fixture types, each serving a specific purpose in your overall plan. Path lights guide visitors safely along walkways, while spotlights create focused beams that highlight specific features like statues or special plants. Flood lights provide broad illumination for security and large areas, perfect for driveways or play spaces. Wall lights mount on exterior surfaces to illuminate entrances and architectural details, while well lights install flush with the ground to create dramatic uplighting effects on walls or plantings. For pure ambiance, string lights create a magical ceiling over gathering spaces, while post lights mark boundaries and provide general illumination. Don’t forget step lights which increase safety on stairs and level changes—a small addition that makes a huge difference in preventing accidents.
When planning path lighting, less is often more. As landscape lighting professional Mark Piantedosi wisely notes, “You want pools of light to guide your eye from one plant to the next, not continuous illumination.” This approach creates a more subtle, neat effect than continuous brightness, with path lights ideally spaced about 10 to 15 feet apart.
One of the most important decisions you’ll make is choosing between low-voltage and high-voltage systems:
| Feature | Low-Voltage (12V) | High-Voltage (120V) |
|---|---|---|
| Safety | Safer around moisture | Requires professional installation |
| Installation | DIY-friendly | Typically needs electrician |
| Cost | More affordable | Higher installation costs |
| Flexibility | Easy to modify and expand | Less flexible once installed |
| Energy Use | More efficient | Higher energy consumption |
| Fixture Options | Wide variety of landscape fixtures | Limited to certain fixture types |
For most of our Fishers homeowners, low-voltage landscape lighting systems have become the go-to choice. They’re safer around children and pets, more cost-effective, and much easier to install yourself if you’re the DIY type. Plus, they’re perfect for gardens, pathways, and creating those magical little moments throughout your landscape.
Picking the Right Bulb
Choosing the right bulb might seem like a small detail, but it dramatically impacts how your outdoor spaces look and feel—not to mention your energy bills!
LED bulbs have completely transformed outdoor lighting ideas in recent years, and for good reason. They use up to 75% less energy than old-school incandescent lights (your wallet will thank you), and they can last up to 40,000 hours—that’s about 20 years of normal use compared to just two years for halogen bulbs. They’re also incredibly durable, standing up to Indiana’s weather extremes from summer storms to winter freezes.
LEDs run much cooler too, reducing fire risk and preventing damage to fixtures. And because they emit light in a specific direction, you get more precise lighting with less waste. The days of constantly replacing burned-out landscape lights are thankfully behind us!
Color temperature is another crucial element that many homeowners overlook. For a warm, inviting atmosphere that makes your outdoor spaces feel like home, stick with bulbs in the 2,700K to 3,000K range. This creates a soft, golden glow similar to traditional incandescent lighting—perfect for creating that welcoming vibe when friends come over for a backyard barbecue. Cooler temperatures (4,000K and above) create a starker, more clinical feel that’s generally less inviting for residential settings.
Different areas of your yard need different brightness levels:
– Path lights work best at 100-200 lumens
– Accent and landscape lights shine at 50-300 lumens
– Entry and porch lights need 300-500 lumens
– Security flood lights require 700-1,300 lumens for proper coverage
At Nix Landscaping’s Outdoor Lighting Solutions, we help our Fishers neighbors find that perfect balance of warmth and brightness for each area of their landscape.
Planning Your Layout
A thoughtful lighting plan is the foundation of a successful project—like having a good recipe before cooking a special meal. Before purchasing any fixtures or digging the first hole, take time to map your property and identify different zones for lighting.
Start by thinking about your entry areas like your front door, garage, and side entrances. These should feel welcoming while providing necessary security. Next, consider pathways including walkways, steps, and driveways that need safe passage. Don’t forget activity areas like patios, decks, and play spaces where family gatherings happen. Your special landscape features like mature trees, garden beds, and water features deserve attention too, along with architectural elements like columns, eaves, and interesting walls. Finally, consider boundaries such as property lines, fences, and transitions between different areas of your yard.
For low-voltage systems, plan your wiring in what we call a hub-and-spoke configuration with a transformer at the center. This smart design uses a heavier gauge main cable (10-gauge) with equal-length branches of 12-gauge cable running to different areas, which helps maintain consistent voltage across all fixtures. No one wants some lights blazing while others barely glow!
Sizing your transformer properly is key to system success. Calculate the total wattage of all your fixtures and multiply by 1.25 to allow for future additions (because trust me, you’ll want to add more lights once you see how beautiful they look). For example, if your fixtures total 200 watts, choose a 250-watt transformer to give yourself room to grow.
Be mindful of voltage drop—a common problem when fixtures are placed far from the transformer. Keep cable runs under 50 feet when possible, or use a larger gauge wire for longer distances to ensure all your lights shine at their intended brightness.
Beam angles matter too, especially for directional lights. Narrow beams (15-30°) are perfect for highlighting specific features like statues or architectural details. Medium beams (30-45°) work well for small trees or garden beds. Wide beams (45-60°) effectively light up larger areas like walls or broad landscape features. Very wide beams (60-120°) provide general illumination for open spaces.
With these fundamentals in place, you’ll be well-equipped to create an outdoor lighting plan that improves your home’s beauty while extending your enjoyment of outdoor spaces long after the sun goes down.
Outdoor Lighting Ideas by Area
When I first started designing outdoor lighting for homes in Fishers, I quickly learned that different areas of your property need different lighting approaches. It’s like decorating the rooms in your house – your kitchen lighting wouldn’t work in your bedroom, right? The same principle applies outdoors.
The magic happens when you layer your lighting. Think of it as creating a lighting sandwich with three essential layers:
- Ambient lighting provides that overall glow that lets you see where you’re walking
- Task lighting focuses on specific activities like grilling or reading
- Accent lighting highlights your favorite features – that gorgeous maple tree or your stone facade
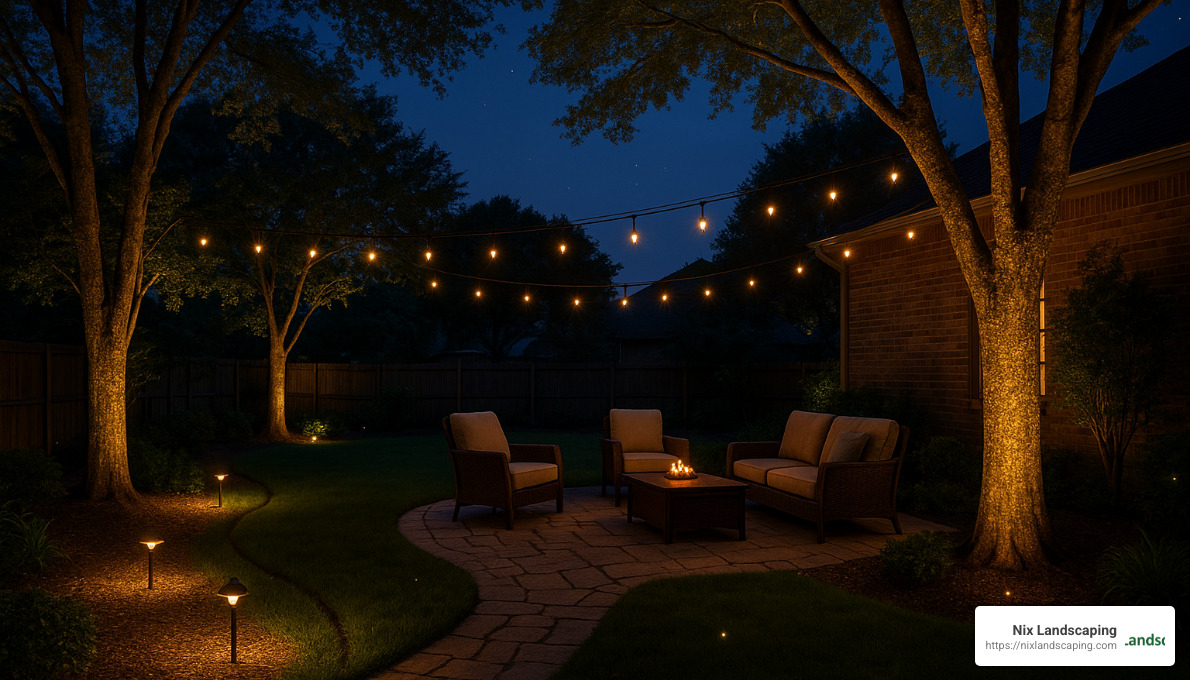
I’ve found that one of the biggest mistakes homeowners make is installing too many lights too close together. This creates a flat, airport-runway effect that lacks dimension. Instead, create intentional pools of light with dark spaces between them. This contrast creates depth and intrigue in your landscape.
Front-Yard Outdoor Lighting Ideas
Your front yard makes that crucial first impression – it’s like your home’s handshake to the world. Good lighting here balances welcome and security.
For your entrance, I recommend placing matching wall sconces on both sides of your front door, mounted at eye level (about 5.5 to 6 feet high). This creates a warm, symmetrical welcome that draws the eye right where you want it – to your entrance. Choose fixtures that complement your home’s style rather than competing with it.
Want to make your home’s architecture shine? Position uplights about 2-3 feet from your exterior walls, aiming upward to highlight interesting features like stonework or columns. The shadows and light play will give your home dimension that flat downlighting simply can’t match.
Driveways benefit from definition lighting. I usually recommend path lights or bollards spaced 10-15 feet apart along the edges. For clients with longer driveways, we often install neat post lights at the entrance or carefully positioned flood lights to provide broader illumination without blinding drivers.
Steps and stairs need special attention for safety. Install step lights in the risers themselves or mount fixtures on adjacent walls. Each step should receive some illumination – this isn’t just about aesthetics, it’s about preventing falls.
For those statement trees in your front yard, try placing 2-3 uplights around the base, positioned at different angles. This creates beautiful dimension and shows off the tree’s structure. Smaller trees (under 20 feet) usually need just two 20-watt equivalent LED uplights, while larger specimens might need three to five to properly illuminate their grandeur.
When it comes to flood lights, follow what I call the “700-lumen rule” – this provides enough light for security without creating that harsh, prison-yard glare that annoys neighbors. And always use warm tones (2700K-3000K) in the front yard – cooler lights can look institutional and unwelcoming.
Backyard Outdoor Lighting Ideas
Your backyard is where the real living happens – it’s your outdoor sanctuary. The lighting here should support everything from intimate conversations to lively gatherings.
String light canopies create instant magic. I’ve installed these over countless Fishers patios, and the change is always remarkable. For areas without convenient trees or structures, we often install decorative poles specifically for supporting these lights. One of my clients in Fishers told me, “It is amazing to see how your outdoor space gets transformed with the addition of string lights. It immediately turns into a magical space!”
Deck lighting defines your space while creating safety. Add cap lights to posts or railings, or for a more modern look, wrap posts with LED strip lighting. This subtle perimeter lighting helps prevent accidents while creating a cozy atmosphere.
Pergolas and gazebos benefit from pendant lights that create an outdoor room feeling. If you prefer a more subtle approach, LED strip lights along the beams provide a gentle glow that defines the space without overwhelming it.
For areas with fire features, less is more. The fire should remain the star of the show. I usually recommend placing low bollards or path lights several feet away to define the seating area without competing with the fire’s natural dance of light.
Water features come alive at night with the right lighting. Submersible LED lights create mesmerizing effects in pools and ponds, while uplights can highlight the movement of fountains or waterfalls. The combination of light, water, and movement creates a multi-sensory experience.
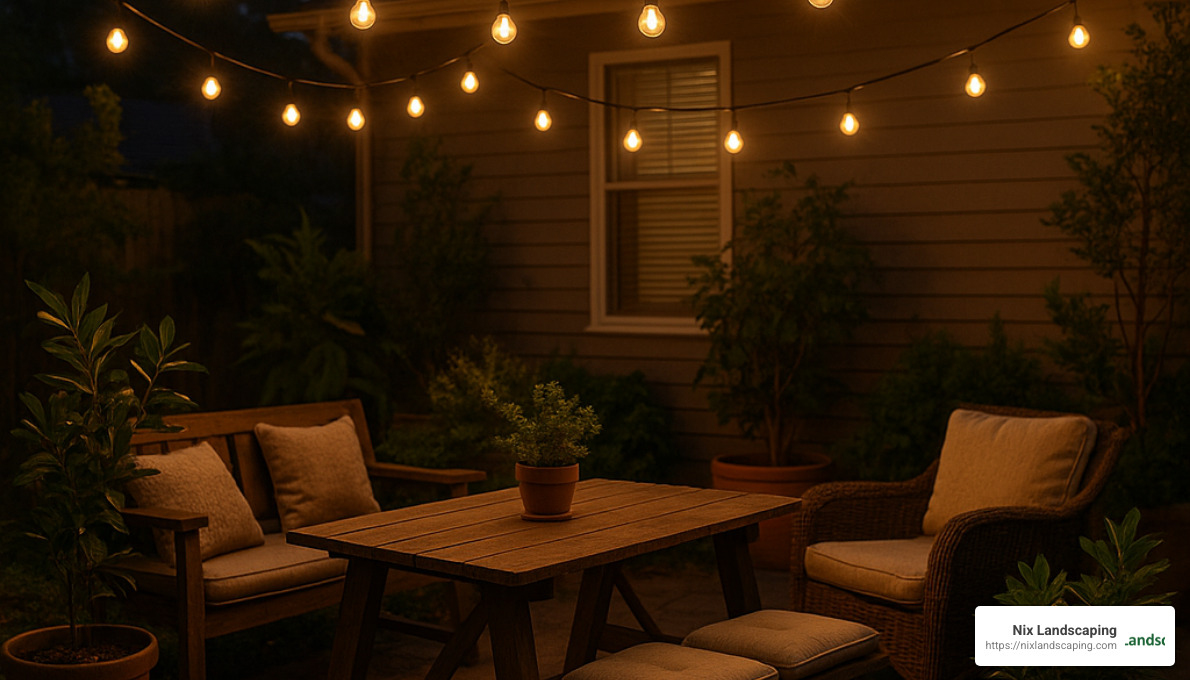
One of my favorite creative solutions for Fishers backyards involves clusters of solar lanterns placed at different heights on shepherd’s hooks. These create beautiful light sculptures that evolve throughout the evening as different lanterns activate in their own time – like a gentle light show that changes with the night.
Pathway & Garden Highlights
Pathways and gardens offer endless opportunities for creative outdoor lighting ideas that blend beauty with function.
For pathway lighting, I recommend installing fixtures 10-15 feet apart for standard models, or 6-8 feet for solar versions that typically produce less light. A designer’s trick I often use is staggering lights on alternating sides of the path. This creates a more natural, flowing feel compared to the symmetrical “airport runway” look that can feel too rigid in a natural setting.
Modern bollard lighting provides a contemporary touch for main pathways. These fixtures cast light downward, illuminating the path while minimizing light pollution – something your neighbors and local wildlife will appreciate.
Garden beds come alive with well lights installed flush with the ground. These hidden gems highlight your plantings without visible fixtures competing with your garden design. They’re particularly effective around the perimeter of garden areas, washing light across your favorite plantings.
Tree uplighting remains one of the most dramatic techniques in our lighting arsenal. Position spotlights at the base of trees, aiming upward to showcase interesting bark textures and branch structures. For truly stunning results, use multiple lights at different angles – this creates depth that a single light simply can’t achieve.
The moonlighting effect is perhaps the most subtle and beautiful lighting technique we use. By installing downlights high in tree canopies and aiming them downward, we create gentle, dappled shadows that mimic natural moonlight filtering through branches. It’s lighting that doesn’t look like lighting – just improved natural beauty.
For garden sculptures or water features, narrow-beam spotlights draw attention to these focal points. Position lights at different angles to eliminate harsh shadows and create dimension.
For modern gardens, defining the boundaries between lawn and garden beds with LED strip lighting creates a contemporary, floating effect that’s especially dramatic in contemporary landscapes.
Gardens grow and change with the seasons. At Nix Landscaping, we position fixtures with future growth in mind, often using adjustable mounts that can be redirected as your plants mature.
“For garden lighting, we often recommend a combination of techniques,” our design team explains. “Uplighting specimen plants, downlighting pathways, and adding a few well-placed accent lights creates a layered effect that brings the garden to life after dark.”
For more professional guidance on creating your perfect outdoor lighting design, explore FX Luminaire’s comprehensive Learning Center at fxl.com – it’s a resource we often recommend to clients who want to understand the possibilities before we begin designing their custom lighting plan.
Designing & Installing for Success
When it comes to bringing your outdoor lighting ideas to life, proper installation makes all the difference between a system that wows for years and one that causes headaches. Whether you’re a dedicated DIYer or planning to call in the pros, understanding the basics helps ensure your lighting vision becomes reality.
I’ve seen many Fishers homeowners tackle their own lighting projects with great success, but it all starts with following some essential guidelines that professionals use on every job.
First, always bury your low-voltage cables at least 6 inches deep. While electrical codes don’t strictly require this for low-voltage systems, it prevents those annoying trip hazards and protects your investment from lawn mower damage. Trust me, nothing ruins a beautiful lighting design faster than accidentally cutting through a cable during routine yard maintenance!
Safety should always be your priority with any outdoor electrical project. Every outdoor outlet powering your lighting system must be GFCI-protected. This isn’t just a good idea—it’s absolutely essential for preventing shock hazards in wet conditions. Indiana’s weather can be unpredictable, and that protection could literally save a life.
Weather protection is another non-negotiable aspect of installation. Always select weatherproof boxes, connectors, and fixtures specifically rated for outdoor use. Look for “wet location” ratings for fixtures fully exposed to rain and “damp location” ratings for covered areas like porches.
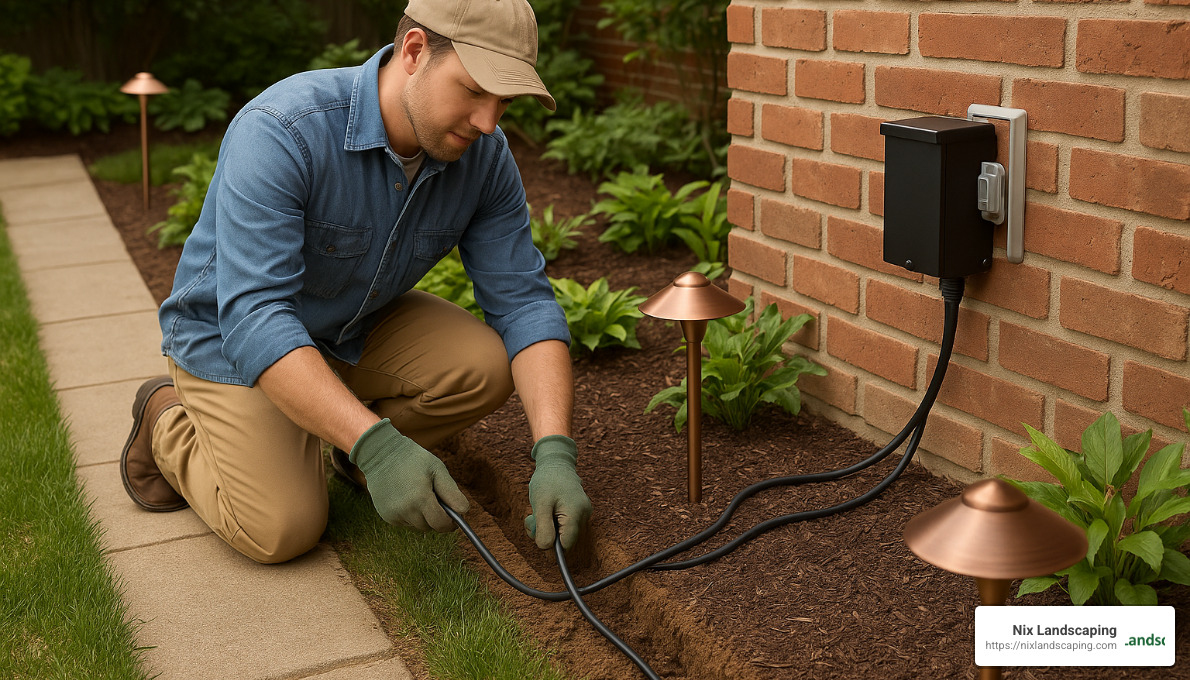
Before you start digging or connecting, gather the right tools for the job. At minimum, you’ll need wire strippers, voltage testers, and waterproof wire connectors. Having everything ready before you start saves those frustrating mid-project trips to the hardware store.

Low-Voltage System DIY Steps
If you’re feeling confident about installing your own low-voltage lighting system, here’s my step-by-step approach that’s worked well for many of our clients who enjoy DIY projects:
Start by mounting your transformer near a GFCI-protected outlet, keeping it at least 12 inches above ground level to protect it from moisture. Connect it to power, but resist the urge to flip it on until everything else is in place.
Next, run your main cable—I recommend 10-gauge for most residential systems—along your planned route. Keep it loose initially so you can make adjustments as you position your fixtures. This main cable will be the backbone of your system.
Now comes the fun part—positioning your fixtures to create the lighting effects you’ve envisioned. Take your time here, testing different locations during both day and evening hours to ensure they’ll look right and function properly.
The “hub-and-spoke” approach is my secret to keeping lights consistently bright throughout your yard. Create equal-length 12-gauge branches from your main cable to each fixture or group of fixtures rather than daisy-chaining everything together. This balanced approach prevents the dim lights at the end of long runs that plague many DIY installations.
When connecting fixtures to your cable, always use waterproof connectors. Most low-voltage systems use connectors that pierce the cable insulation with small screws, creating a secure electrical connection without cutting the main line.
Before finalizing anything, turn on your transformer and test every fixture. This crucial step saves you from having to dig up buried cables to fix issues later. Once everything’s working properly, secure your fixtures, bury your cables, and program any timers or smart controls.
One of our clients in Fishers shared: “I was nervous about installing my own landscape lighting, but following Nix Landscaping’s advice made it straightforward. The hub-and-spoke wiring method they recommended made a huge difference in keeping all my lights consistently bright.”
When to Call a Pro
While I love seeing homeowners tackle their own lighting projects, there are definitely situations where professional help makes sense. Knowing when to DIY and when to call in experts can save you time, money, and potential safety issues.
High-voltage (120V) installations should always be handled by a licensed electrician. These systems carry significant shock risks and must meet strict electrical codes. The peace of mind is worth every penny.
If you’re planning to integrate your lighting into a comprehensive smart home system, professional setup typically provides the smoothest experience. While DIY smart lighting has come a long way, complex integrations with other home systems benefit from expert knowledge.
Installing moonlighting effects high in trees might look magical, but the installation process can be dangerous. These liftd installations require specialized equipment and safety protocols that most homeowners don’t have access to. At Nix Landscaping, we’re fully equipped and trained for these challenging installations.
For larger properties in Fishers and surrounding areas, professional design becomes particularly valuable. Extensive systems often require multiple transformers, specialized wiring configurations, and careful planning to ensure consistent brightness and reliable operation across the entire property.
Water feature lighting also benefits from professional installation. Underwater or near-water installations have specific safety requirements that professionals understand and implement properly. The combination of water and electricity demands extra caution.
At Nix Landscaping, we provide comprehensive design and installation services custom to your specific property and vision. Our team handles everything from initial concept to final programming, with ongoing maintenance support to keep your outdoor lighting ideas looking their best season after season. We’ve helped hundreds of homeowners throughout Fishers transform their outdoor spaces with lighting that’s both beautiful and practical.
Smart, Sustainable & Budget-Friendly Upgrades
The world of outdoor lighting has transformed dramatically in recent years. Today’s technology offers exciting ways to improve your landscape while being mindful of both your wallet and the environment. At Nix Landscaping, we’ve helped countless Fishers homeowners find the perfect balance between beauty, functionality, and sustainability.
Smart lighting has completely changed how we think about outdoor illumination. Instead of simply flipping a switch, you can now control your entire landscape lighting system with incredible precision. Motion sensors provide security by activating lights only when someone approaches, saving energy when no one’s around. Programmable timers let you create custom schedules for different areas of your yard, while photocell controls automatically adjust to seasonal daylight changes.
“My favorite upgrade was adding app control to our outdoor lighting,” shares one of our Fishers clients. “Now I can dim the patio lights during dinner parties or brighten the security lights when the kids are coming home late—all from my phone without leaving the couch!”
The possibilities have expanded even further with voice-activated systems that connect to Alexa or Google Home, letting you adjust your outdoor lighting with simple commands. For those who love to celebrate holidays or create different moods, color-changing LEDs offer endless possibilities, from subtle warm-white illumination to festive colors for special occasions.
Several free apps work brilliantly with compatible lighting systems. Philips Hue offers excellent control for both indoor and outdoor fixtures, while IFTTT creates automated routines based on triggers like weather changes or sunset times. SmartThings integrates your lighting with other smart home features, and Lutron Caséta provides user-friendly scheduling options. According to latest research on energy savings, combining LED technology with smart controls can reduce outdoor lighting energy consumption by up to 70%—a significant benefit for both your utility bills and the environment.
Eco-Friendly Choices
Making sustainable choices doesn’t mean sacrificing beauty or effectiveness in your outdoor lighting design. Modern solar-powered fixtures have come a long way from the dim, unreliable options of years past. Today’s solar lights feature improved photovoltaic panels and battery storage, with some providing up to 19 hours of illumination after a full day’s charge—more than enough to last through the longest summer evening.
Dark-sky compliant fixtures represent another important eco-friendly choice. These specially designed lights direct illumination downward rather than allowing it to scatter into the night sky. Not only does this reduce light pollution that interferes with stargazing, but it also minimizes disruption to nocturnal wildlife while still providing effective lighting for your property.
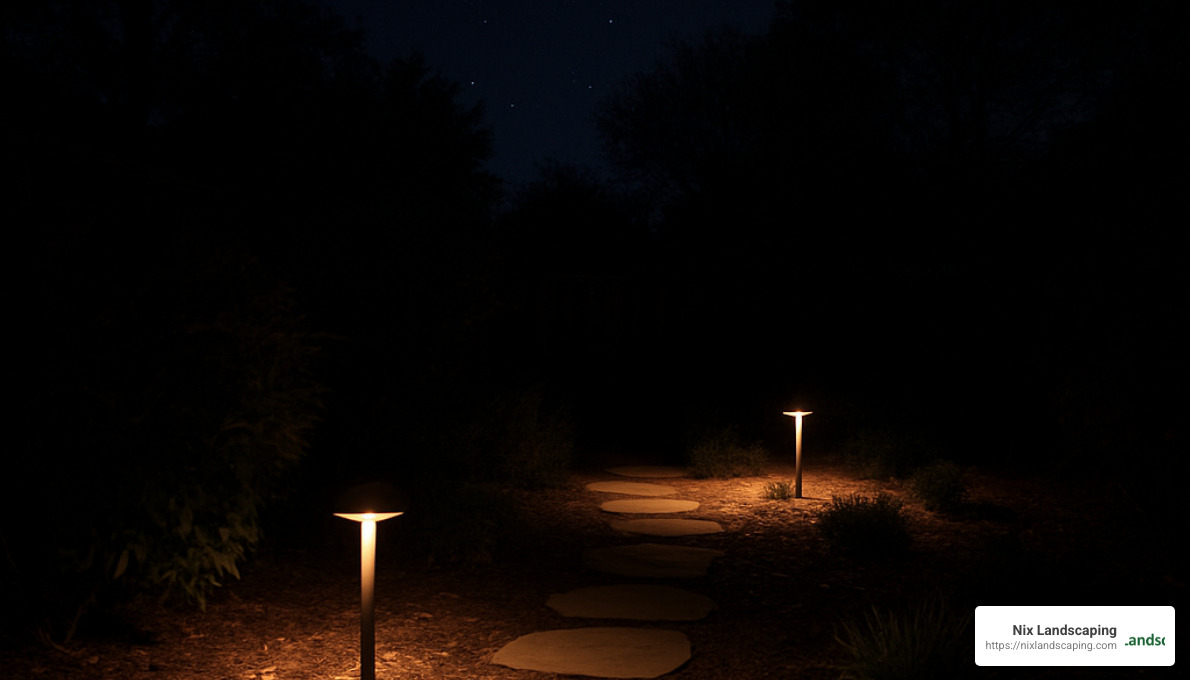
Material choice matters too. We often recommend fixtures made from sustainable or recyclable materials like copper, brass, or certain types of aluminum. These not only weather beautifully but can be repurposed at the end of their lifecycle, reducing landfill waste.
“When designing outdoor lighting in Fishers, we always consider the environmental impact,” explains our team at Nix Landscaping. “By combining dark-sky friendly fixtures with smart controls, we can create beautiful effects while minimizing energy use and light pollution.”
The efficiency of LED technology continues to improve, with today’s fixtures producing more light with less energy than ever before. When selecting LEDs, look for the highest lumens-per-watt ratio to get maximum illumination with minimal power consumption.
Creative DIY on a Budget
Beautiful outdoor lighting ideas don’t have to break the bank. We’ve helped many homeowners in Fishers create stunning effects on limited budgets through creative approaches and clever DIY solutions.
Planter pole string lights have become one of our most popular recommendations for budget-conscious clients. By filling large decorative planters with concrete and inserting poles, you create portable supports for string lights that can transform any space into a magical evening retreat. This approach is particularly perfect for renters or those who like to reconfigure their outdoor spaces seasonally.
Mason jar lanterns offer charming, inexpensive lighting for tables, steps, or pathways. Simply fill clean jars with battery-operated LED string lights, or use solar-powered lids that charge during the day and glow beautifully at night. The soft, diffused light creates a warm, welcoming atmosphere that’s perfect for intimate gatherings.
For deck and porch areas, rope light railings provide an neat lighting solution at a fraction of the cost of custom installations. Weather-resistant LED rope lights can be wrapped around railings or tucked underneath handrails to create a subtle glow that defines the space while improving safety.
We’ve seen incredible creativity from homeowners repurposing indoor items for outdoor use. Indoor rattan lampshades transformed with weatherproof sockets and bulbs create distinctive hanging pendants, while empty wine bottles filled with LED string lights become unique table accents or garden features.
One Fishers homeowner shared: “After getting a quote for professional lighting that was beyond my budget, Nix Landscaping helped me design a DIY approach using planter poles for string lights and solar path lights. The effect is beautiful, and I spent less than a quarter of the original quote.”
For those who want flexibility without commitment, solar stake lights provide an excellent entry point to outdoor lighting. These inexpensive fixtures can be repositioned as your garden evolves, allowing you to experiment with different effects before investing in a permanent wired system.
Paint bucket uplights offer another budget-friendly solution that delivers professional-looking results. By placing LED puck lights in painted plastic buckets positioned strategically throughout your landscape, you can create dramatic uplighting effects that highlight trees, architectural features, or garden focal points.
At Nix Landscaping, we believe everyone deserves beautiful outdoor lighting, regardless of budget. Whether you’re ready for a comprehensive smart lighting system or looking for creative DIY solutions, we’re here to help you illuminate your outdoor space in ways that reflect your personal style while respecting your financial priorities.
Frequently Asked Questions about Outdoor Lighting
How bright should outdoor lights be?
Figuring out the right brightness for your outdoor lights doesn’t have to be complicated. Think of it like the story of Goldilocks – not too bright, not too dim, but just right for each space.
For most decorative and ambient lighting around your yard, you’ll want to stay in the softer range of 50-200 lumens. Path lights work best at 100-200 lumens, creating those inviting pools of light that guide you through the landscape without feeling like a stadium. Garden accent lights can be even gentler at 50-100 lumens – just enough to highlight your favorite plants without overwhelming them. Those charming decorative lanterns on your tables or hanging from trees? About 50-150 lumens creates that perfect warm glow.
When it comes to areas where you’re actually doing things, like cooking or reading, you’ll need to bump up the brightness. Entry and porch lights should sit around 300-500 lumens to welcome guests and help with keys. If you’re grilling after sunset, aim for 400-700 lumens over your cooking space so you can actually see if that burger is done. Reading nooks and seating areas need about 300-400 lumens – enough light to see your book without feeling harsh.
Security lighting plays by different rules. Flood lights protecting your property typically need 700-1300 lumens to effectively illuminate larger areas. Motion-sensor lights work well at 700-1000 lumens, and driveway lighting generally needs 600-800 lumens to provide safe navigation.
Here’s a little secret many homeowners find too late: multiple softer lights almost always create a more pleasant effect than one super-bright fixture. That single bright light creates harsh shadows and glare, while several gentler lights create depth and dimension.
Are solar lights worth it in cloudy climates?
“But what about solar lights in Fishers? We’re not exactly Arizona!” This is something we hear from clients all the time. The good news is that today’s solar lighting technology has come a long way from those dim, unreliable lights of the past.
Modern solar lights use high-efficiency panels that can generate power even when the sun isn’t directly beaming down. The key is to look for fixtures with monocrystalline solar panels, which significantly outperform the older polycrystalline technology on cloudy days. These premium panels can collect useful energy even from indirect daylight.
Battery capacity makes a huge difference too. Quality solar lights now come with batteries (800 mAh or higher) that store enough juice to keep lights running for 2-3 evenings without a full recharge. This means they can coast through a stretch of cloudy weather without leaving you in the dark.
To get the most from solar lights in our Indiana climate:
- Face panels southward whenever possible
- Keep them away from trees or buildings that cast shadows
- Wipe the panels clean occasionally (especially after pollen season!)
- Choose spots that receive at least 4-6 hours of daylight
- Consider using solar for accent lighting while keeping wired options for critical security areas
We’ve installed solar lighting for dozens of Fishers homeowners, and the feedback has been overwhelmingly positive, especially for path lights and decorative accents. For consistent, bright illumination in security zones, we often recommend traditional wired options – or sometimes a thoughtful combination of both.
What maintenance is required?
Even the best outdoor lighting ideas need a little TLC to keep shining bright year after year. Think of your lighting system like your car – a little regular maintenance prevents bigger problems down the road.
When spring arrives in Fishers, it’s the perfect time to clean those fixture lenses that collected winter grime. Check for any damage from freeze-thaw cycles (especially common in our Indiana winters) and make adjustments for all the new plant growth that’s about to happen. Those perfectly aimed lights from last fall might now be pointing straight into your hostas!
Summer brings rapid plant growth that can quickly engulf fixtures. A quick walk-through on a summer evening helps spot lights that have disappeared into your landscaping. It’s also prime time to check for damage from lawn equipment – we’ve seen many wire connections accidentally severed by enthusiastic weed trimming. Solar panel fixtures need extra attention now to wipe away pollen and dust that block precious charging time.
When autumn leaves start falling, they love to settle on your lighting fixtures. A quick cleaning prevents moisture buildup that can damage components. This is also when you’ll want to adjust timers for earlier darkness – there’s nothing more frustrating than arriving home to a dark house because your lights are still on “summer schedule.”
Winter brings its own challenges with snow and ice. After storms, check that fixtures haven’t been damaged and that snow hasn’t buried your lights completely. Those cold months are also when corrosion tends to accelerate at connection points, so a visual inspection can catch problems early.
“I tell my clients that five minutes of maintenance each season saves hours of troubleshooting later,” shares Kyle Nix, our founder. “Just walking your property with a flashlight after dark once every few months lets you catch most issues before they become real problems.”
The good news about modern LED systems is their incredible longevity. Most quality LED bulbs will shine for 7-10 years (or even longer) before needing replacement. Connection points and weatherproofing seals might need attention every 3-5 years, especially with our temperature swings in central Indiana.
At Nix Landscaping, we offer seasonal maintenance packages for busy homeowners who want to enjoy their beautiful lighting without the upkeep. Just another way we help keep Fishers looking brilliant after dark!
Conclusion & Next Steps
As the sun sets and darkness falls, well-planned outdoor lighting ideas transform your property into a magical nighttime retreat. More than just illumination, thoughtful lighting creates an entirely new experience of your outdoor spaces—one that extends your living area beyond your home’s walls and into the evening hours.
Throughout this guide, we’ve explored lighting techniques that improve both the beauty and functionality of your property. From string lights dancing overhead on your patio to carefully positioned path lights guiding visitors safely along walkways, each element serves a purpose while contributing to the overall ambiance.
The magic of outdoor lighting lies in its ability to completely transform how you use and enjoy your property. Imagine stepping outside on a warm summer evening to entertain friends under the soft glow of café lights, or enjoying a quiet moment of reflection beside a beautifully lit water feature. These experiences become possible when you implement the right outdoor lighting ideas for your specific needs.
Beyond the obvious aesthetic benefits, quality outdoor lighting delivers practical advantages that improve your daily life. Your family and guests will steer your property with greater safety after dark. Strategic security lighting deters unwanted visitors while creating peace of mind. And of course, your home’s curb appeal gets an instant boost, potentially increasing property value should you ever decide to sell.
One of my favorite aspects of outdoor lighting is how it reveals landscape features that go completely unnoticed during daylight hours. The texture of tree bark, the graceful branches of ornamental trees, and the architectural details of your home take on new life when illuminated from carefully chosen angles. These nighttime revelations often become the most captivating elements of your landscape.
At Nix Landscaping, we believe that lighting should reflect your unique property and lifestyle. Our approach begins with understanding how you use your outdoor spaces and what elements matter most to you. We then develop a comprehensive lighting plan that brings your vision to life, whether that means creating intimate gathering spaces, highlighting special landscape features, or simply ensuring safe passage through your property after dark.
If you’re ready to explore the possibilities for your Fishers home or business, we’re here to help. Whether you’re considering a complete professional installation or seeking guidance for your DIY project, our team can provide the expertise you need to illuminate your property beautifully and effectively.
For more information about our complete range of outdoor services, including lighting design and installation, visit our services page or contact us for a personalized consultation. Together, we’ll create an outdoor lighting plan that transforms your property into a nighttime oasis you’ll enjoy for years to come.

