
Transform Your Outdoor Space with Water Features
Have you ever noticed how the sound of flowing water instantly makes you take a deep breath and relax? That’s the magic of water features installation – a project that can transform your ordinary backyard into a personal sanctuary in just one week.
I’m Kyle Nix, owner of Nix Landscaping in Fishers, Indiana. Over the years, I’ve watched countless homeowners’ faces light up when they see their new water feature for the first time. There’s something truly special about adding the element of water to your outdoor space.
The journey from plain yard to personal oasis follows a simple timeline:
| Day | Focus | Key Tasks |
|---|---|---|
| 1-2 | Planning | Select feature type, research benefits, measure space |
| 3-4 | Materials | Gather supplies, choose location, check for utilities |
| 5 | Installation | Excavate, level basin, install plumbing and pump |
| 6-7 | Finishing & Testing | Add decorative elements, test water flow, troubleshoot |
Water features do more than just look pretty. They engage all your senses – the gentle sound masks neighborhood noise (goodbye, lawn mower symphony!), the sight of sparkling water catches sunlight in magical ways, and even the air around your feature feels fresher thanks to negative ions produced by moving water.
Your property value can increase by 7-15% with a well-designed water feature, but the real value is in creating a space where you naturally want to spend time. My clients often tell me they find themselves enjoying their yards more than ever after water features installation.
The beauty of these projects is their flexibility. If you’re just dipping your toes in (pun intended), you might start with a simple bubbling boulder that can be installed in an afternoon. For the more ambitious, a pond with waterfall might be your weekend project. Either way, the investment in time and materials pays dividends in daily enjoyment.
Before grabbing your shovel, take a moment to consider what you’re hoping to achieve. Are you creating a meditative space just for you? A wildlife habitat for local birds and butterflies? Or perhaps an impressive focal point for entertaining? Your answer will guide everything from location to size to materials.

At Nix Landscaping, we specialize in creating custom water features that look like they’ve always been part of your landscape – while requiring minimal maintenance. Whether you’re tackling this as a DIY project or looking for professional guidance, I’m excited to help you bring the soothing sounds of water to your outdoor space.
Want to dive deeper into water features installation? Check out these helpful resources:
– Build pond with waterfall
– Cost to build a backyard pond
– Garden pond build
Day 1-2: Water Feature Types & Benefits
The first two days of your water features installation journey should focus on exploring different options and understanding what each can bring to your backyard. This foundation will help you choose a water feature that perfectly matches your space, lifestyle, and personal taste.
I’ve seen countless homeowners in Fishers transform their ordinary yards into peaceful retreats with the right water feature. As one client told me after we finished her project, “It’s like having a vacation spot right in my backyard!”
Residential Options at a Glance
When planning your water features installation, you’ll find several exciting possibilities to consider:
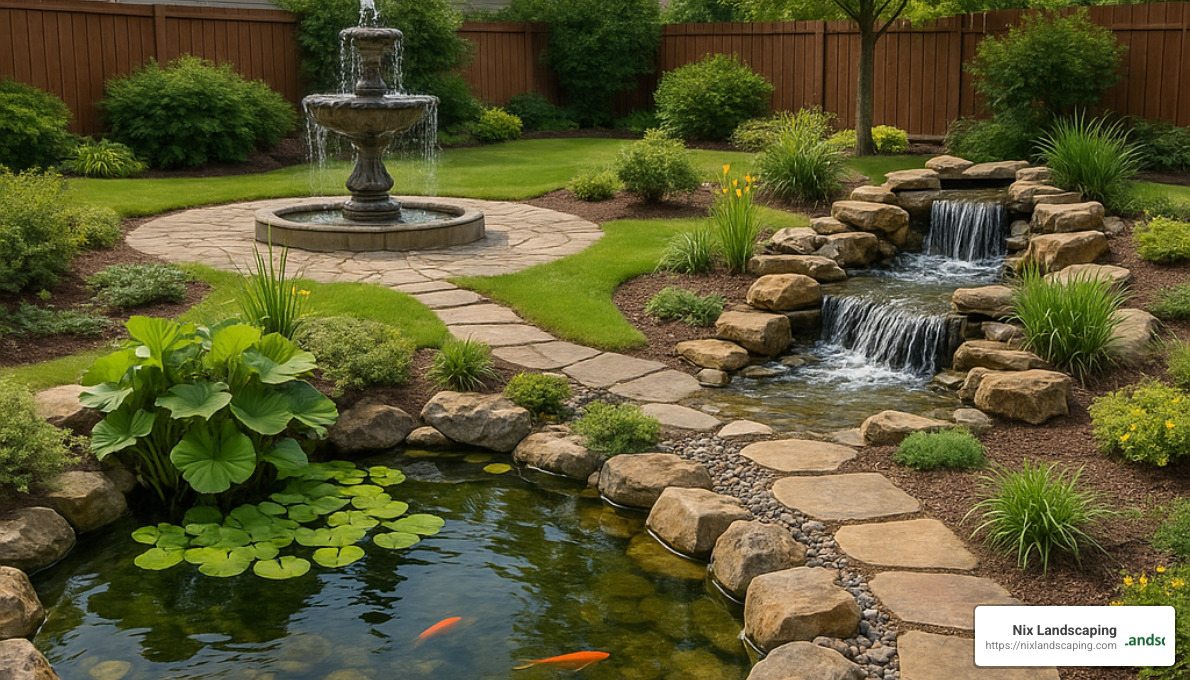
Garden ponds create living ecosystems where fish and plants thrive together. These mini habitats change with the seasons, bringing year-round interest to your landscape. Many of our Fishers clients enjoy watching koi fish grow and develop personalities over the years.
Fountains offer endless design flexibility, from classic tiered styles to modern spheres and bubbling urns. They work wonderfully in smaller spaces and provide that soothing water sound without much maintenance.
Pondless waterfalls give you the visual drama and peaceful sounds of falling water without an open basin. The water disappears into a hidden gravel reservoir, making this option safer for homes with young children and requiring less upkeep.
Water walls provide a contemporary look perfect for modern homes or small spaces. These vertical features can stand alone or be installed against existing structures, creating a sleek water curtain effect.
Bubbling boulders combine natural stone elements with water movement. We often install these for clients who want something subtle yet engaging – water bubbles up through the core of the stone and gently cascades down the sides.
Rain gardens serve a practical purpose by capturing runoff while adding beauty to your landscape. Here in Fishers, we recommend positioning them at least 10 feet from your foundation and making them around 150 square feet for optimal function.
Splash pads offer family-friendly water play without the safety concerns of standing water – perfect for households with young children.
| Feature Type | Maintenance Level | Wildlife Appeal | Cost Range | Safety Considerations |
|---|---|---|---|---|
| Garden Pond | Medium-High | Excellent | $2,500-$10,000+ | Requires safety measures for children |
| Fountain | Low | Good (birds) | $500-$5,000 | Minimal concerns |
| Pondless Waterfall | Low-Medium | Good | $3,000-$8,000 | Very safe design |
| Water Wall | Low | Minimal | $2,000-$7,000 | Minimal concerns |
| Bubbling Boulder | Low | Good (birds) | $1,500-$3,000 | Very safe design |
| Rain Garden | Low-Medium | Excellent | $1,000-$3,000 | No standing water |
Why Moving Water Matters
The benefits of adding water to your landscape go far beyond just creating something pretty to look at:
Water features engage all your senses at once. The sparkle of sunlight on water catches your eye, the gentle splashing soothes your ears, and on hot Indiana summer days, the cooling mist refreshes your skin. This multi-sensory experience is what makes water features so captivating.
Stress reduction is perhaps the most valuable benefit. After installing water features for hundreds of clients, I’ve heard countless stories about how the sound of running water helps them unwind after long workdays. Scientific research backs this up – natural water sounds actually trigger our body’s relaxation response.
Noise masking is another practical advantage. Many of our Fishers neighborhoods deal with traffic noise or nearby construction. A strategically placed waterfall can reduce ambient noise by up to 30%, creating a more peaceful backyard environment.
Air purification happens naturally around moving water. As water moves, it releases negative ions that bind with dust particles, helping cleanse the surrounding air. You’ll notice the difference when you sit near your water feature – the air just feels fresher.
Property value increases with thoughtfully designed water features. Real estate data suggests that attractive water elements can boost home values by 7-15%. That makes your water features installation both a lifestyle improvement and a smart investment.
Wildlife attraction happens organically once you add water to your landscape. Birds will visit for bathing and drinking, butterflies will stop by, and beneficial insects will help keep your garden healthy. Many of our clients report seeing species they never noticed in their yards before.
As I often tell my clients here in Fishers, “Nothing transforms a backyard quite like the sight and sound of water.” Whether you’re looking for a dramatic focal point or a subtle accent, the right water feature can completely change how you experience your outdoor space.
Day 3-4: Planning, Location & Materials
With a clear understanding of water feature types and benefits, days 3-4 focus on proper planning, site selection, and gathering materials. This preparation phase is crucial for a successful water features installation.
Site Selection Checklist
Choosing the right location is perhaps the most important decision you’ll make. At Nix Landscaping, we recommend considering these factors:
Viewing Angles: Position your water feature where it can be enjoyed from key indoor and outdoor areas. I always tell my clients to stand at their kitchen windows and patio doors – these are the spots where you’ll most often glimpse your water feature. As Brian Helfrich wisely notes, “Consider a homeowner’s view from kitchen windows and bedroom sliding doors when positioning the feature.”
Sun/Shade Balance: Finding that perfect balance between sun and shade can be tricky. Too much shade and your water lilies won’t bloom properly; too much sun and you’ll be fighting algae all summer. From our experience in Fishers, most water features do best with morning sun and afternoon shade. This gives aquatic plants the light they need while preventing excessive water temperature increases.
Slope Considerations: Nature has already done half the work if your yard has a gentle slope! We can use that natural elevation for a waterfall that flows toward your viewing area. If your yard is flat (as many are in Fishers), don’t worry – we can build a berm to create that perfect cascade effect. The sound of water is most enjoyable when the waterfall faces your seating areas.
Underground Utilities: I can’t stress this enough – always call before you dig! Hitting a gas line or electrical cable can be dangerous and expensive. Call 811 at least three days before your project starts. It’s free, it’s required by law, and it prevents disasters.

Power Access: Every water feature needs electricity for the pump. Plan for a GFCI-protected outlet within reasonable distance, or budget for electrical work. Safety first – water and standard electricity don’t mix!
Tree Roots: Those beautiful oak trees might provide nice shade, but their extensive root systems can puncture pond liners and make excavation a nightmare. Stay at least 10 feet away from large trees when possible.
Child Safety: If you have little ones running around, consider a pondless feature or ensure proper safety measures. A pond can be designed with gently sloping sides and shallow areas, or surrounded by strategic plantings to prevent accidental access.
Storm Runoff: Avoid low areas where heavy rain could wash landscape debris into your feature. In Fishers, our clay soils often create drainage challenges that need addressing before installation.
Shopping & Budget Guide
With your location selected, it’s time to gather materials. Here’s what you’ll need for your water features installation project:
For simple fountains, you’ll want a quality basin, appropriately sized pump, fountain head, decorative gravel, and leveling sand. I always recommend fountain kits for first-timers – they ensure all components work together perfectly.
Pond installations require more materials: EPDM rubber liner (the most durable option), protective underlayment, properly sized pump, filtration system, skimmer box, and edging stones. Don’t skimp on liner quality – replacing it later is a massive undertaking!
For pondless waterfalls, you’ll need a waterfall box, reservoir basin with grate, pump vault, heavy-duty pump, liner, underlayment, and plenty of stone and gravel. These systems hide the water reservoir underground while still providing the sight and sound of flowing water.
When it comes to plumbing, always use Schedule 40 PVC pipe for water features – it’s durable enough to withstand pressure and weathering. Regular irrigation tubing just won’t cut it for the long term.
“We highly recommend using a kit for your outdoor fountain project,” advises Aquascape, a sentiment we share at Nix Landscaping for first-time installers. Kits ensure compatibility between components and simplify the process.
Budget-wise, be prepared for some variation:
– Simple fountain kits start around $500
– Pondless waterfalls typically range from $3,000-$8,000
– Full pond installations can range from $2,500-$10,000+
You can save money by renting specialized tools rather than purchasing them. Local stone is often more affordable than imported varieties, and at Nix Landscaping, we have great relationships with local suppliers in the Fishers area.
For clients watching their pennies, I often suggest starting with a smaller feature that can be expanded later. A bubbling boulder gives you that soothing water sound at a fraction of the cost of a full pond system. You can always add on as your budget allows!
Before finalizing your plans, check if your neighborhood requires permits for water features. Most small fountains don’t need permits, but ponds over a certain size might. And don’t forget to verify your property’s setback requirements – the last thing you want is to build your dream water feature only to find it violates local codes.
For more detailed guidance, check out our guides on how to build pond with waterfall and cost to build a backyard pond.
Day 5: The Water Features Installation Process
Day 5 is when the magic happens! With all your planning complete and materials at the ready, it’s time to break ground and bring your water features installation vision to life. This is where rubber meets the road—or in this case, where water meets stone.
Water Features Installation—Fountain Workflow
Installing a fountain is one of the more approachable water features for DIY enthusiasts. Here at Nix Landscaping, we’ve guided many Fishers homeowners through this process:
Start by marking your basin area with spray paint or a garden hose, then dig about 4-6 inches deeper than your basin height. This extra depth allows room for your stabilizing base. Next, add 2-3 inches of sand or gravel to the bottom of your excavation and compact it thoroughly. This creates both drainage and a stable foundation for your fountain.
Carefully place your basin in the prepared hole and grab your spirit level—this step is crucial! Perfect leveling in all directions will ensure your fountain operates correctly and looks its best. As we often tell our clients, “A tilted fountain is like a crooked picture frame—once you notice it, you can’t unsee it!”

With your basin level, install the pump in the center (or according to your specific fountain’s instructions) and run the power cord through the designated channel. Most fountains include a notch or tube specifically for this purpose. Then assemble the fountain components, connecting everything to the pump using the provided tubing.
Before adding water, surround your basin with decorative stone or gravel. I always recommend giving these stones a quick rinse first—this simple step prevents cloudy water and gives your fountain that crystal-clear look from day one.
Finally, fill with water, ensuring the pump is completely submerged, and plug it in! Let it run for several hours while you watch for any leaks or flow issues. You may need to make minor adjustments to achieve that perfect water cascade.
Water Features Installation—Pond Workflow
Pond installation requires more effort but follows a logical sequence that any determined homeowner can tackle:
Begin by outlining your pond shape—a garden hose works perfectly for this. Then start digging, creating different depth zones as you go. These varying depths create shelves for different types of aquatic plants and add visual interest to your pond.
Once excavation is complete, smooth out any sharp edges and remove protruding roots or stones. Lay down protective underlayment followed by your pond liner, leaving plenty of excess material around the edges. This extra liner will be trimmed later, but it’s much easier to start with too much than too little!
Position your skimmer box at water level on one end of the pond. This will collect debris and house your pump. If you’re including a waterfall (and we highly recommend it!), place your biological filter at the opposite end, preferably on higher ground to create natural water flow.
Connect these components using Schedule 40 PVC pipe—this commercial-grade material stands up to pressure and weather conditions better than standard PVC. We’ve seen too many water features installation projects fail because of inadequate plumbing materials.
As you begin to add stone, start with larger rocks around the edges to secure your liner in place. Then add smaller stones and gravel to cover the liner completely, creating a natural-looking transition from water to land. As Brian Helfrich wisely notes, “If the client wants koi, the pond needs to be at least 24 inches deep.” This depth provides enough space for fish to thrive while helping maintain stable water temperatures year-round.
Fill your pond gradually, pulling and adjusting the liner as you go to minimize wrinkles. Once filled to the appropriate level, install your pump in the skimmer box and test the system. The moment when water first cascades over your waterfall is truly magical!
For pondless waterfalls, the workflow is similar but focuses on creating a hidden reservoir that recirculates water without an exposed pond. These are perfect for families with small children or those wanting lower maintenance.
At Nix Landscaping, we’ve found that taking your time with the installation process pays dividends in the long run. A properly installed water feature will provide years of enjoyment with minimal maintenance headaches. And remember, if you’d rather leave the digging to the professionals, our team is always ready to create the perfect water feature for your Fishers home!
For a detailed step-by-step guide, check out this helpful step-by-step pond guide that complements our approach to water features installation.
Day 6-7: Troubleshooting, Maintenance & Aesthetic Upgrades
The final days of your water features installation journey are all about putting on the finishing touches and making sure everything runs smoothly. Think of it as the difference between a basic water feature and one that truly becomes the centerpiece of your outdoor sanctuary.
Common Mistakes & How to Fix Them
Even the pros at Nix Landscaping occasionally encounter challenges with water features. Here’s how we solve the most common issues:
That beautiful fountain that’s spilling more water on one side? That’s a poor leveling issue. You’ll need to drain it, adjust the base material underneath, and carefully re-level. A carpenter’s level is your best friend here!
If your waterfall seems more like a water-dribble, you probably have an undersized pump. We’ve seen this countless times in Fishers homes. The solution is straightforward—replace it with a properly sized pump that matches your feature’s volume and desired flow rate.
Heavy Indiana summer storms can turn your serene pond into an overflow problem if you’re missing proper drainage. Adding an overflow pipe directed away from your home’s foundation solves this issue and protects your landscaping.
Over time, the soil around your feature may settle, causing structural wobbles or liner shifts. We recommend thoroughly compacting the soil during installation and adding additional material as needed to prevent soil settling issues.
Those mysterious pump shutdowns? Often it’s just a tripped GFCI outlet. These safety devices are sensitive (for good reason), especially in humid Indiana summers. A simple reset usually does the trick, but if it keeps happening, it’s time to call an electrician.
Small leaks in your pond liner aren’t the end of the world. Special underwater patch kits work wonders for minor punctures. For persistent leaks, you might need to play detective—drain the feature and carefully inspect the entire liner.
Year-Round Care Schedule
Your water feature changes with the seasons, and so should your maintenance routine:
When spring arrives in Fishers, it’s time for the annual spring cleanout. Remove debris that accumulated over winter, clean filters thoroughly, and restart pumps after checking connections. This is also the perfect time to add beneficial bacteria to jump-start your pond’s ecosystem and reintroduce any fish that were wintered elsewhere.
Summer maintenance is pretty simple—check water levels weekly (Indiana heat can increase evaporation), clean your skimmer basket every 1-2 weeks, and keep aquatic plants trimmed. This is when your water features installation truly shines, so the goal is simple maintenance that lets you enjoy rather than work.
Fall brings beautiful colors but also falling leaves. Installing a leaf net over your pond prevents debris accumulation that can cause water quality issues. As temperatures drop, reduce fish feeding and begin planning for winter. We recommend trimming back aquatic plants before they can decompose in the water.
Winter in Fishers means freezing temperatures that can damage your water feature if not properly prepared. For small features, we typically recommend draining completely, cleaning, and covering until spring. For ponds with fish, keep a small pump running to maintain an opening in the ice for gas exchange. A floating de-icer can be a lifesaver during particularly cold spells. Many of our clients choose to remove pumps entirely from features that won’t run during winter.
“In the winter, you can either leave your fountain running or shut it down,” depending on your feature’s design and your particular microclimate. Most of our Fishers clients opt to winterize completely to avoid potential damage.

Aesthetic Upgrades
Once your water features installation is running smoothly, consider these improvements that can take it to the next level:
Nothing transforms a water feature quite like LED lighting. Underwater lights create magical evening reflections, while perimeter lighting highlights architectural elements. Modern LEDs use minimal electricity and last for years—a worthwhile investment for extending enjoyment into the evening hours.
Adding aquatic plants does double duty—they’re beautiful and they help maintain water quality. Water lilies provide stunning flowers and shade (which helps control algae), while marginal plants create a natural transition from water to land. At Nix Landscaping, we often recommend native Indiana species that thrive in our climate.
The right decorative stone can lift your water feature from nice to stunning. Consider mixing stone sizes and colors for a more natural look. We’ve even used colorful glass pebbles in modern designs to create unexpected visual interest.
Small statuary pieces or water spitters inject personality into your water feature. Whether it’s a classic frog spitter or a contemporary abstract sculpture, these elements become conversation pieces and focal points.
Surrounding your water feature with native plantings creates a cohesive, natural look while supporting local wildlife. Plants like cardinal flower, blue flag iris, and swamp milkweed thrive near water and attract beautiful pollinators to your yard.
For the practical-minded homeowner, auto-fill valves are game-changers. These devices maintain proper water levels automatically, preventing pump damage from running dry. As one of our clients recently told us, “Nothing is more magical than the auto-fill feature keeping my fountain topped off without me having to remember.”
Looking for more inspiration for your outdoor space? Check out our Backyard Design Ideas for creative ways to incorporate your new water feature into your overall landscape plan.
The scientific research on nature-sounds confirms what we’ve always known at Nix Landscaping—the sound of moving water genuinely reduces stress and improves wellbeing. Your new water feature isn’t just beautiful; it’s good for you too!
Frequently Asked Questions about Water Features Installation
How deep should a koi pond be?
Koi fish aren’t just beautiful—they need proper space to thrive! For healthy, happy koi that are protected from neighborhood predators (like herons and raccoons), your pond should be at least 24 inches deep, though 36 inches is really the sweet spot.
“If a client wants koi, the pond needs to be at least 24 inches deep,” explains Brian Helfrich, and we’ve found this advice to be spot-on with our Fishers clients. This depth isn’t just about giving fish room to swim—it’s crucial for maintaining stable water temperatures when seasons change.
Here in Indiana, where winter temperatures regularly dip below freezing, deeper ponds resist freezing solid, which is absolutely essential for your finned friends’ survival. Those extra inches provide a refuge when ice forms on the surface, allowing koi to overwinter successfully in your backyard oasis.
How much weekly maintenance is required?
Good news! Water features installation doesn’t mean signing up for another time-consuming chore. Most homeowners are pleasantly surprised by how little maintenance their water features actually require.
For simple fountains, you’re looking at about 15 minutes weekly—just checking water levels and fishing out any leaves or debris that might have blown in. Ponds with proper filtration systems need around 20-30 minutes of attention each week, mainly to clean out skimmer baskets and give everything a quick visual inspection.
As one of our happy pond owners shared, “Die-hard gardeners won’t mind getting in a large pond to divide waterlilies or do other basic pond chores. Avoid an area of the yard with a lot of trees if the homeowner doesn’t want to frequently empty the skimmer basket of leaves and debris, although this is a simple task, provided the skimmer has a basket inside.”
If even that sounds like too much, consider a pondless waterfall. These low-maintenance options can reduce water usage by up to 50% compared to traditional ponds while still providing that soothing sound and visual appeal you’re after.
Do I need a permit for a backyard water feature?
The answer is the classic “it depends”—but don’t worry, we’ll help you steer this! In Fishers, IN, most small water features installation projects (under a certain size and depth) don’t require permits. However, larger ponds or features that might affect your property’s drainage patterns could need official approval.
We always recommend touching base with your local building department before starting any project. It’s a quick phone call that can save headaches later. And don’t forget about homeowners associations—they often have their own set of rules about landscape modifications.
One non-negotiable step: always call 811 to have underground utilities marked before you dig. This free service prevents dangerous and costly utility line damage. We’ve seen too many DIY projects hit unexpected gas or water lines, and trust us—that’s not the kind of water feature you want!
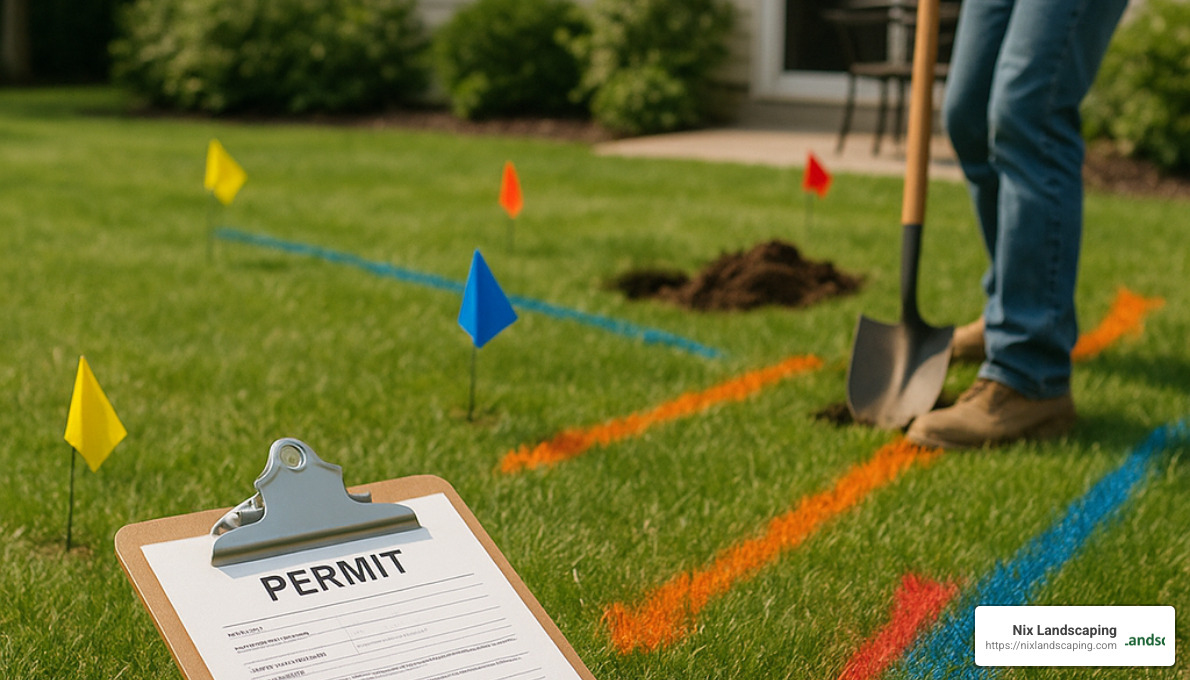
At Nix Landscaping, we help clients through every step of the permitting process when needed. Our familiarity with local regulations in Fishers means your water features installation will be both beautiful and by-the-book, giving you peace of mind along with your peaceful water feature.
Conclusion
Learning water features installation in just 7 days is absolutely achievable with the right guidance and a dash of enthusiasm. By following our structured approach—from understanding different feature types to maintaining your finished creation—you can transform that ordinary backyard into something truly special.
Water features bring something magical to outdoor spaces that few other landscape elements can match. The gentle splashing that masks your neighbor’s lawnmower, the sparkle of sunlight on water that catches your eye from the kitchen window, the way guests naturally gather around your pond during summer barbecues—these moments create a new relationship with your outdoor space.
Here at Nix Landscaping in Fishers, IN, we’ve watched countless homeowners refind their yards after adding water features. One client told us, “I used to just look at my backyard through the window. Now I have my morning coffee by the fountain every day.” That’s the kind of change we love to see—not just in the landscape, but in how people live in their homes.
Your water feature will evolve beautifully over time. Those water lilies will spread, beneficial microorganisms will establish themselves, and each season will bring new character to your creation. There’s something deeply satisfying about watching a landscape element that actually improves with age rather than deteriorating.
Whether you decide to tackle this project yourself with our guidance or bring in our experienced team, you’re creating something that will bring joy for years to come. Our approach at Nix Landscaping focuses on understanding your unique vision first, then blending it seamlessly with your existing landscape. We’ve helped hundreds of Fishers residents create everything from simple meditation fountains to elaborate multi-tier waterfall systems that transform entire properties.
The best part? Your perfect water feature is just 7 days away. And remember, our team is always here to help with advice, quality materials, or full-service installation if you decide the DIY route isn’t for you halfway through digging that pond!
Ready to create your own backyard oasis? We’d love to help you bring moving water into your outdoor living space—it might just be the best landscape decision you’ll ever make.

